Introduction
Artwork by Ska-fandr.
Welcome to -BrokeN-'s guide to
 Ember Spirit
. This is my first ever guide and
a lot of time and effort went into this, so I hope you guys enjoy! All images that are not mine have been sourced, with a subscript link at the bottom of the image to the source/artist. This guide will be updated constantly with minor changes/fixes and for major patches, and you can keep up to date with the changes in the
Changelog at the bottom of the guide!
 Ember Spirit
 is a Melee Agility Carry, most often played in the Midlane. Strong at all points in the game with the correct itemization, Ember Spirit is able to output a large amount of Magic/Physical damage in the early game, transitioning into a ridiculous amount of Burst-Physical damage in the late game. He is extremely mobile and versatile.
The Hero excels in farming, fighting, and ganking, and is incredibly fun to play. He requires some finesse however, along with some quick fingers and good attention to detail!
For those looking for the steam version of the item build to use in-game, it's located in the Itemization chapter!
Information about Ember
Stats
 Image from Ember's Dota 2 wiki page. Image from Ember's Dota 2 wiki page. |
|
Lore
Lost within the Wailing Mountains, the Fortress of Flares lay abandoned, its training halls empty, its courtyard covered in leaves and dust. Upon a dais in its sealed temple rests a topaz cauldron filled with ancient ash, remnants of a pyre for the warrior-poet Xin. For three generations, Xin taught his acolytes the Bonds of the Guardian Flame, a series of mantras to train the mind and body for the harsh realities beyond the fortress walls. However, in teaching a warrior's way he earned a warrior's rivals, and in his autumn Xin was bested and slain. His followers spread to the wind. Yet as years turned to centuries and followers to descendants, his teachings endured by subtle whisper and deed. Touched by the teacher's lasting legacy, the Burning Celestial, inquisitive aspect of fire, cast himself to the Fortress of Flares and reignited the pyre ash. From these glowing embers emerged an image of Xin, wreathed in flame, his thoughtful countenance prepared to train and to teach, and to spread the fires of knowledge to all who seek guidance.
|
Click on the quote to listen, but watch out - it might be loud! This quote changes automatically every few hours. Come back later to see a new one!
Drafting Phase
First off; some Pros and Cons of  Ember Spirit
|
|
Pros
- Extremely mobile
- Lots of versatility
- Strong throughout entire game
- Very hard to kill
- Good at both farming & fighting
- Fun to play!
|
|
Cons
- Melee hero, low base armour
- Struggles laning against some Heroes
- Very item dependent as game progresses
- Hard to master!
|
A lot of the game can be decided during Drafting - and as a Hero with many counters, we want to be careful about how we draft! Keep in mind, this section is written to assuming that it is the Ranked All Pick/Ranked Random Draft gamemode - in Ranked Captain's Mode, Ember can be picked up earlier, and heavy counters can be banned out!
When picking
 Ember Spirit
, we want to avoid picking first at all costs. If picked first, there's a high probability that the rest of the enemies Draft will revolve around making your life a living-hell.
Ember is probably best as a 3rd or 4th pick. You may receive one or two counter picks this way, but it allows your final picks to counter pick better and to support your current draft. However in the newer Ranked Random Draft mode, if Ember is in the pool your might want to prioritize snapping him up a little earlier, as a player on the enemy team is more likely to snap him up, as there are less options, and Ember is directly displayed to him, as a fun, available Hero. It's sort of a mentality thing, but it matters. In Random Draft, you're also able to see if some of his counters are absent from the Hero pool, making picking him more viable, or vice versa. So keep a keen eye out!
When should/shouldn't I pick Ember?
During drafting we watch out for Heroes that are strong against us, or that we're strong against. Things in red are bad and mean we don't want to pick
 Ember Spirit
, while things in green are good and make Ember a good pick:
- Silences

- Single Target Lockdown

- Physical Damage

- Magic Damage

- Lack of Stuns/Silence

- Kiteable Heroes

- Low Armour Heroes

If the enemy team has an excessive amount of lockdown (e.g.
 Bane
Bane,
 Legion Commander
,
 Silencer
,
 Storm Spirit
 etc.) and a lot of Physical damage (e.g.
 Phantom Assassin
,
 Templar Assassin
,
 Ursa
Ursa, etc.) we want to try and avoid picking
 Ember Spirit
.
For your own team, Heroes with strong AoE disables or methods of grouping enemies together for a period of time (e.g.
 Magnus
,
 Dark Seer
,
 Disruptor
,
 Enigma
, etc.) work extremely well with
 Ember Spirit
 at all stages in the game, excelling into the late game.
Abilities & Skillbuild
First of all a brief synopsis of what each of  Ember Spirit's abilities are and what they do; hover over the ability icon to see it's scaling and stats.
|
|

|
|
Searing Chains is a very strong ability when used correctly. Upon cast, any two units within the AoE will become chained for a duration based on the level of the skill, as well as doing damage over time. The two units are chosen at random, so try and make sure there are no more than two units within the AoE when casting. When cast, chains will issue a stop command to its targets. This means that any action they were performing will instantly be halted and they will have to do it again (similar to when you press the stop key on your keybord). While under the affect of Searing Chains,  Anti-Mage and Anti-Mage and  Queen of Pain are prevented from casting Queen of Pain are prevented from casting  Blink, Blink,  Puck is prevented from casting Puck is prevented from casting  Phase Shift, Phase Shift,  Spirit Breaker is prevented from casting Spirit Breaker is prevented from casting  Charge of Darkness, and Charge of Darkness, and  Nature's Prophet is prevented from casting Nature's Prophet is prevented from casting  Teleportation. Does not hit units affected Teleportation. Does not hit units affected  Black King Bar or Black King Bar or  Repel. Repel.
|
|
|

|
|
Sleight of Fist is what makes  Ember Spirit such a terrifying opponent in the late game. It's a point target AoE ability, and when cast, all units that were in the AoE upon time of cast will be hit by Ember, applying bonus damage on top of Ember's current damage. Ember randomly moves between targets until each one has been attacked once, with a delay of 0.2 seconds in between each jump. When finished, Ember will return to the position of cast. All units that were in the AoE upon time of cast will be hit as I said before, so this includes if an enemy escapes with a Ember Spirit such a terrifying opponent in the late game. It's a point target AoE ability, and when cast, all units that were in the AoE upon time of cast will be hit by Ember, applying bonus damage on top of Ember's current damage. Ember randomly moves between targets until each one has been attacked once, with a delay of 0.2 seconds in between each jump. When finished, Ember will return to the position of cast. All units that were in the AoE upon time of cast will be hit as I said before, so this includes if an enemy escapes with a  Town Portal Scroll or leaves the AoE before their turn - they will still be hit. The one exception is if they become invisible/invulnerable. All spells and items can be used during Sleight of Fist, the most notable of which being Town Portal Scroll or leaves the AoE before their turn - they will still be hit. The one exception is if they become invisible/invulnerable. All spells and items can be used during Sleight of Fist, the most notable of which being  Searing Chains, allowing you to Chains an enemy from distance by casting chains during the 0.2 second window that your Sleight of Fist targets them. All attack modifiers and damage that Ember has will be applied during Sleight of Fist, since he does attack each unit normally as well as apply the bonus damage. You can also use SoF to dodge spells, because during the duration you are invulnerable/off the map. Dodging projectiles is harder, as they need to hit you while you are invulnerable - as you cannot disjoint them with SoF. Here you can find a video explaining how to consistently dodge projectiles. Searing Chains, allowing you to Chains an enemy from distance by casting chains during the 0.2 second window that your Sleight of Fist targets them. All attack modifiers and damage that Ember has will be applied during Sleight of Fist, since he does attack each unit normally as well as apply the bonus damage. You can also use SoF to dodge spells, because during the duration you are invulnerable/off the map. Dodging projectiles is harder, as they need to hit you while you are invulnerable - as you cannot disjoint them with SoF. Here you can find a video explaining how to consistently dodge projectiles.
|
|
|

|
|
Flame Guard creates a fiery shield around  Ember Spirit in a small AoE when cast, dealing damage per second based on level. The shield also absorbs incoming magical damage, making it incredibly good against magical nukes. The duration and amount of absorption scale per level. When not being used as a shield, Flame Guard is best used as a farming tool, as it will damage all creeps around you in an AoE. It's recommended to max this first as it allows you to be much more aggressive in your lane, push better, and farm faster. Flame Guard can be purged by items such as Ember Spirit in a small AoE when cast, dealing damage per second based on level. The shield also absorbs incoming magical damage, making it incredibly good against magical nukes. The duration and amount of absorption scale per level. When not being used as a shield, Flame Guard is best used as a farming tool, as it will damage all creeps around you in an AoE. It's recommended to max this first as it allows you to be much more aggressive in your lane, push better, and farm faster. Flame Guard can be purged by items such as  Eul's Scepter of Divinity, and Eul's Scepter of Divinity, and  Diffusal Blade, as well as some skills ( Diffusal Blade, as well as some skills ( Demonic Purge, Demonic Purge,  Fortune's End, etc). Fortune's End, etc).
|
|
|

|
|
 Ember Spirit's Ultimate, Fire Remnant allows him to place remnants of himself which he can jump to when casting Ember Spirit's Ultimate, Fire Remnant allows him to place remnants of himself which he can jump to when casting  Activate Fire Remnant. It's a charged base ability with a maximum of three charges, each of which have an independent cooldown and duration when placed. When placing Remnants, they will travel outwards from Ember towards the the point that they were cast on, in a straight line. They Remnant will travel to targeted location at 2.5x Ember's current speed, meaning if he is slowed, the Remnant will travel slowly too. When jumped too, the Remnants will explode dealing damage in an AoE. Tip! You can use Activate Fire Remnant. It's a charged base ability with a maximum of three charges, each of which have an independent cooldown and duration when placed. When placing Remnants, they will travel outwards from Ember towards the the point that they were cast on, in a straight line. They Remnant will travel to targeted location at 2.5x Ember's current speed, meaning if he is slowed, the Remnant will travel slowly too. When jumped too, the Remnants will explode dealing damage in an AoE. Tip! You can use  Sleight of Fist to gain extra distance on your Remnant, since you can cast Remnant during SoF, cast it as you jump to a unit farther away from you. You will cast the Remnant from that point, gaining additional distance. This will also likely put you far enough away from the Remnant to safely jump to it and travel the full distance without reaching it to early (see; Understanding Remnant Speed). Sleight of Fist to gain extra distance on your Remnant, since you can cast Remnant during SoF, cast it as you jump to a unit farther away from you. You will cast the Remnant from that point, gaining additional distance. This will also likely put you far enough away from the Remnant to safely jump to it and travel the full distance without reaching it to early (see; Understanding Remnant Speed).
|
|
|

|
|
Activate Fire Remnant is what allows  Ember Spirit to jump to his Remnants. It can be cast globally, and upon cast, Ember will jump to each Remnant currently placed on the map, reaching the targeted Remnant last. When jumping to Remnants, Ember travels at a speed of 1300 units per second, or reaches the Remnant in 0.4 seconds - whichever is faster. Ember Spirit will destroy any trees he passes through on his path to the Remnant. Spells and items can be cast during Activate Fire Remnant. As with Ember Spirit to jump to his Remnants. It can be cast globally, and upon cast, Ember will jump to each Remnant currently placed on the map, reaching the targeted Remnant last. When jumping to Remnants, Ember travels at a speed of 1300 units per second, or reaches the Remnant in 0.4 seconds - whichever is faster. Ember Spirit will destroy any trees he passes through on his path to the Remnant. Spells and items can be cast during Activate Fire Remnant. As with  Sleight of Fist, you can use this ability to dodge spells and projectiles. Keep in mind you cannot disjoint them, so you want them to hit you while you are in the duration of Activate Fire Remnant. You can do this by travelling towards the projectile in remnant form (again, you can see this demonstrated in previously linked video, Here). For more information about this skill make sure to read Understanding Remnant Speed. Sleight of Fist, you can use this ability to dodge spells and projectiles. Keep in mind you cannot disjoint them, so you want them to hit you while you are in the duration of Activate Fire Remnant. You can do this by travelling towards the projectile in remnant form (again, you can see this demonstrated in previously linked video, Here). For more information about this skill make sure to read Understanding Remnant Speed.
|
Understanding Remnant Speed
Understanding the speed at which our
 Fire Remnant
 travels, and the speed at which we travel to it, and how to maximize the potential of this is pretty important. Here I'll try and display the basic math and reasoning in simple steps so it's understandable. Open the spoiler to view (it's fairly long);

Spoiler: Click to view
- Remnant travels at 2.5x Ember's current movespeed.
- Ember jumps to Remnant at a speed of 1300 Units per Second (UPS), or reaches it in 0.4 seconds.
- If the Remnant is less than or equal to 520 Units away from you, 1300 UPS will be chosen.
- If the Remnant is farther than 520 Units, Ember should reach the Remnant in 0.4 seconds.
- This is because 1300 x 0.4 = 520 Units, so 520 Units is the max distance that can be traveled in under 0.4 seconds, at 1300 UPS.
- The game calculates the distance you are from the Remnant upon cast of Activate Fire Remnant, and then fixes the speed.
- This means if the Remnant is still mid-air and travelling while you jump to it, but is under 520 Units away from you, Ember will become travelling to it at a speed of 1300 UPS.
- Within the time you take to travel those 520 Units at 1300 UPS, the Remnant has moved farther forward.
- You will remain travelling at 1300 UPS even though the Remnant is more than 520 Units away from the point of initial cast.
- If the target location was 1000 Units away from initial cast, it will take you roughly 0.77 seconds to travel this distance at 1300 UPS.
- This is because 1000/(1300/10) = ~7.7 , and 7.7/10 = 0.77 seconds.
- If the Remnant had been more than 520 Units away, the game would have calculated that it would be faster to reach the Remnant in 0.4 seconds rather than travel at 1300 UPS.
- To reach a target location 1000 Units away in 0.4 seconds, Ember will travel at 2500 UPS.
- This is because 1000/0.4 = 2500 , meaning you will reach the Remnant twice as fast.
- However, this may cause Ember to reach the Remnant before it finishes travelling.
- Ember's average movespeed is 360 with most boots. 360 x 2.5 = 900 , so the Remnant travels at 900 UPS.
- Again using our previous example of 1000 Units, if we travel towards the Remnant with a maximum travel time of 0.4 seconds, the Remnant only has 0.4 seconds to continue travelling.
- 900 x 0.4 = 360 Units, so the Remnant will only travel an additional 360 Units before Ember reaches it at this rate. (Note that this is equal to Ember's current movespeed).
- 520 Units + 360 Units = 880. This means we do not travel the full 1000 Units as we reach the Remnant too quickly.
- 1000 - 360 = 640 , so as long as the Remnant is more than 640 Units away from us (if travelling to a point 1000 Units away), we will travel the full distance.
- The formula for working this out is a little more complicated that just subtracting the movespeed from the distance, unfortunately - rather, it's based on percentages.
- To work it out, we need to convert our movespeed into a percentage of the distance. So this means finding out how much percentage our movespeed is of the distance the Remnant will travel.
- As an example, lets say we have 410 movement speed and throw the Remnant 1320 Units.
- 100(410/1320) = ~31 , so 410 is roughly 31% of 1320. We now need to subract this percent from 100%, leaving us with 69%.
- This means that in this example, our Remnant will have to be 69% done with it's journey for us to jump to it and still achieve maximum distance.
- It's not possible to do this instantly in your head in-game every single time you use the spell, so instead we will go off a basic rule of thumb;
- When throwing out a Remnant, wait till the Remnant is roughly 70% done with it's journey before jumping to it, as this will give you best results most of the time.
- Keep in mind that as if Ember is moving towards the Remnant as it travels outwards, each unit that he moves is equal to subracting that number of units from the distance the Remnant has traveled.
- This means if Ember travels 100 units as his Remnant is moving away from him, the Remnant will have to travel 100 Units farther to reach the same percentage of it's journey as it would have if Ember had stood still, effectively.
- For basic variables, the slower your movespeed or higher the distance thrown, the higher the percentage of the Remnants journey traveled will have to be to achieve maximum distance.
- The higher your movespeed, or lower the distance thrown, the lower the percentage of the Remnants journey traveled will have to be to achieve maximum distance.
- TL;DR: Don't jump to your Remnant too early! When the Remnant is ~70% of done with it's travel distance, this is the sweet spot for jumping to it as early as possible and yet still travelling the maximum distance. Practice!
Skill Builds
 Ember Spirit
 is actually quite versatile when it comes to skilling, so it's hard to pinpoint any number of specific builds, since they are each dependent on the situation and can be affected by split second events/decisions, or simply by what you need that game. That being said, I've included the main 3 builds below. Keep in mind that these are
guidelines and do not have to be followed exactly. All these builds will have one thing in common, which is that
 Fire Remnant
 will always be skilled at Levels 6, 24, and 25 - with stats taking priority.


This is my standard go-to build for
 Ember Spirit
. With
 Flame Guard
 maxed at Level 7, we can play aggressively as well as farm and push well. We're also protected from whatever magical nukes the opposing midlaner has, and can use Flame Guard to harass our opponent in the lane. We pick up a point in
 Sleight of Fist
 at Level 8 in order to allow us to use it in conjunction with
 Searing Chains
. The reason we dont need to get our third point in Chains before this is because the duration remains the same between Levels 2 and 3 Chains. We then make sure we have our third point in Searing Chains. The reason I like getting three points but not maxing it is because Searing Chains really hits a sweet spot at Level 3. While the duration remains the same, the damage
doubles with just this one skillpoint, making it a very valuable pickup. We then max Sleight of Fist, as the larger AoE of Sleight of Fist allows us to make more reliable
 Sleight of Fist
 +
 Searing Chains
 combos, as well as have a reliable source of physical damage that we can use on fleeing enemies. Also, what damage is lost from not maxing Searing Chains is made up for by the reliable damage of Sleight of Fist. We level stats instead of our Ultimate, as the scaling on
 Fire Remnant
 is pretty bad and the damage increase is minimal, and most of the time we wont be using Remnants for damage anyway - so skilling stats will help us more in the long run by increases our survivabilty, mana pool, and damage.


This skillbuild revolves around relying on dominating your lane. It's very rare that I'd go this skillbuild, but it can work well when laning against Heroes you have a clear advantage over. These sorts of Heroes would be Heroes that are Melee, and dont have great magical nukes (so we can afford to max Chains first). A few examples of these would be
 Pudge
Pudge,
 Bloodseeker
,
 Templar Assassin
 (lets just pretend she's melee), etc. We dedicate most our our time to the midlane and with our high level in
 Searing Chains
 we can easily control the runes. We max
 Flame Guard
 second so we can harass in lane and do more damage while Chaining enemies, and push the lane once they have been killed/have backed. If you ever wanted a reason to justify
 Phase Boots
, it'd probably work quite well with this Skillbuild, especially considering we don't level
 Sleight of Fist
 till later. As with all of these Skillbuilds,
 Fire Remnant
 is gotten at 6 and then skipped until Level 24 and 25.


This is the rarest Skillbuild of the three. Basically here we are maxing
 Sleight of Fist
 and
 Searing Chains
 as soon as possible in order to increase our early burst damage against squishy targets. What allows us to do this is if our opponents are not only squishy, but lack strong magical nukes, meaning we can level Sleight of Fist over
 Flame Guard
. We still take two points in Flame Guard early on in order to help win our lane, as we can use it to harass our opponent back in midlane and secure us some Last Hits, as well as use it for what every low-damaging magical damage spell that our opponent has (e.g.
 Undying
's
 Decay
Decay. Undying wouldn't be mid, but you get the idea). It's important to pay attention to all factors here as only going for the high burst damage against squishy targets can often be a bad idea - for example, trying this build against a
 Zeus
Zeus or a
 Skywrath Mage
 probably wont work out for you, and trying it against a
 Shadow Fiend
 will just lose you that lane even harder. This build is extremely situational, so as a general rule of thumb, stick to the other two.
It's important to remember that...
...these builds are just guidelines and do not have to be followed exactly. Sometimes picking up an extra point in
 Searing Chains
 to net you a kill when you see the chance, or snagging a quick point in
 Sleight of Fist
 to get the last hit on that pesky midlaner escaping under tower can be just what you need to give you the edge or secure a kill. Some general tips for each skill would be;
- Consider taking more points in
 Searing Chains if your enemy is faster than you/has some form of escape and you need the extra lockdown.
- You can take a value point in
 Sleight of Fist to dodge spells such as
  Lightning Storm,
  Shadow Strike, or
  Dragon Slave in lane.
- If your enemy has a lot of magical nukes, be sure to max
 Flame Guard.
Itemization
Steam version of the Item Build located here! You can use this one to follow in-game.
As  Ember Spirit we need to pay attention to which items will benefit us the most and when to get them. Ember Spirit is a lot more versatile than people think, and there are a large array of items that we can use to good effect.
Early Game
This section only covers the basics of early game itemization. More detail on lane specific itemization during the laning phase will be covered in the Laning section.
In the early game our main objective is to get as much as we can out of the laning phase. No matter what lane you're in, picking up a
 Stout Shield
 is necessary to mitigate oncoming damage from both Creeps and Heroes, especially as a Hero with exceptionally low base armour. This we will upgrade into a
 Poor Man's Shield
 at our earliest convenience. Sufficient regen is important and in lanes where heavy harass may cause us grief, picking up a
 Healing Salve
 as soon as possible can be just what we need. Against Hereos which spam spells a lot in lane (e.g.
 Leshrac
,
 Zeus
Zeus,
 Bloodseeker
,
 Bristleback
,
 Phantom Assassin
), picking up a
 Magic Stick
 in our starting items will provide enough sustain to stay in lane through the constant harassment. In addition to this, picking up the new
 Infused Raindrops
 as soon as you can against match-ups with a lot of magical damage can not only help you survive, but allow your
 Flame Guard
 to stay up and assist you in otherwise impossible kills. You can watch a video about this interaction;
Here.
Aquila or Drums?

Spoiler: Click to view
TL;DR - Buy a  Ring of Aquila in most games. It's far more cost efficient and has everything you're looking for.
This seems to be a pretty popular debate when it comes to
 Ember Spirit
, so I think it's important to cover it here. Either
 Drum of Endurance
 or
 Ring of Aquila
 is often gotten after Boots and before
 Battle Fury
 to provide some early game stats.
In 9/10 cases, Aquila will benefit you far more than the Drums will. Aquila, not only being far more cost effecient (and not delaying your Battle Fury as much), provides you with a fair bit more damage than Drums provides. It provides some well needed mana regeneration, and most importantly, it provides
armour. A lot of people say that Drums is better since it gives more Strength and gives a boosted HP pool for more suvivability - and while this is true, on Ember, honestly, we want the armour more. Since Ember Spirit already has good protection against Magical Damage due to
 Flame Guard
, his main weakness is Physical Damage. Ember Spirit starts with incredibly low base armour, and likely wont be building much Agility items, so getting what armour we can is very important and often will do more for us than the slightly boosted HP pool. Especially since
6.87, where the stats provided by Drums were greatly reduced.
True, the movement speed from Drums is not aquired through Aquila, but Aquila being cheaper makes going the
 Boots of Travel
 route more viable (and quicker) which supplements the lack of movement speed.
So when is Drums a good choice then? Well, if the game isn't going as smoothly as it possibly could, or you feel that you need to fight a lot as a team early on into the game, and you want have all that much time to farm, getting a Drums can really benefit your team and help you have the edge in fights. Certainly if you're playing an offlane Ember where reaching that crucial
 Battle Fury
 timing is less important, a Drums can be a viable choice. It's also good against teams with a large amount of magical/pure damage and are very hard to kill quickly (requiring more chasing/investment).
Choice of Boots
So there are 3 main choices of Boots that are viable on
 Ember Spirit
, those being
 Phase Boots
,
 Power Treads
, and
 Boots of Travel
. Out of these, the one I would least recommend building Phase Boots. Why? Phase Boots are good for about the first 15-20 minutes of the game and allow you to snowball in your lane better - but as the game goes on, they fall off rapidly and they don't provide any valuable stats to us; and compared to either Power Treads or Boots of Travel, they fall short in other areas too, for example farming and splitpushing, which will help us scale better as the game progresses. However, in my opinion, with the recent changes in 6.85 and subsequently 6.86, Phase Boots on Ember has received a nice buff and is more on par with Treads again.
|
|

|
|
Since 6.85, Phase Boots on  Ember Spirit are greatly improved. The increased movement bonus when Phase is active makes getting off Ember Spirit are greatly improved. The increased movement bonus when Phase is active makes getting off  Searing Chains or the last autoattack a lot easier, and the only downside, the decreased Phase duration, barely affects Ember at all. The reason for this is that once an enemy is chained in place, we don't really need to be chasing after him at high speeds, and since 6.86, using Spells/Items no longer cancels the Phase active, so by having a shorter duration but larger burst movement speed, we are able to catch up much easier, Chains, and potentially Phase walk through our target to the other side to gain some additional ground on him for when Chain's wears off. However my personal recommendation is still to stick to either of the other pairs of Boots, but Phase are now viable in terms of dominating mid, and fighting/ganking a lot early. Also since Phase gives us no good stats, we are basically required to by a Searing Chains or the last autoattack a lot easier, and the only downside, the decreased Phase duration, barely affects Ember at all. The reason for this is that once an enemy is chained in place, we don't really need to be chasing after him at high speeds, and since 6.86, using Spells/Items no longer cancels the Phase active, so by having a shorter duration but larger burst movement speed, we are able to catch up much easier, Chains, and potentially Phase walk through our target to the other side to gain some additional ground on him for when Chain's wears off. However my personal recommendation is still to stick to either of the other pairs of Boots, but Phase are now viable in terms of dominating mid, and fighting/ganking a lot early. Also since Phase gives us no good stats, we are basically required to by a  Drum of Endurance, which in the end means we're spending more gold than we need to on items which are good but not the best. Phase also have a nice interaction with Drum of Endurance, which in the end means we're spending more gold than we need to on items which are good but not the best. Phase also have a nice interaction with  Fire Remnant now, which you can read about; Here! Fire Remnant now, which you can read about; Here!
|
|
|

|
|
Power Treads are what we go when the game isn't going so well. Not necessarily a bad game, but it's just not going as well as it could, and going  Boots of Travel is a bit too much of an expensive route this game. Power Treads provide us with good stats which benefit us in a multitude of ways. They increase farming speed, and with the ability to Tread Switch combined with our Boots of Travel is a bit too much of an expensive route this game. Power Treads provide us with good stats which benefit us in a multitude of ways. They increase farming speed, and with the ability to Tread Switch combined with our  Bottle, we have much better management of our HP and MP. Attack speed is also hugely underrated on Bottle, we have much better management of our HP and MP. Attack speed is also hugely underrated on  Ember Spirit, because there are definitely times where you will be sitting attack enemies, especially during the early game ganks, and whilst farming. Ember Spirit, because there are definitely times where you will be sitting attack enemies, especially during the early game ganks, and whilst farming.  Phase Boots don't help us as much here, as they don't provide any of the attack speed or stats that treads do, and essentially require us to build Phase Boots don't help us as much here, as they don't provide any of the attack speed or stats that treads do, and essentially require us to build  Drum of Endurance, which is quite a lot of gold spent on lack-luster items. Treads + Aquila will provide almost the same amount of damage, more tankability, better farming/pushing ability, and better overall HP/MP management, and all for a cheaper price. Drum of Endurance, which is quite a lot of gold spent on lack-luster items. Treads + Aquila will provide almost the same amount of damage, more tankability, better farming/pushing ability, and better overall HP/MP management, and all for a cheaper price.
|
|
|

|
|
Boots of Travel are what I'd consider the go-to pair of shoes on  Ember Spirit. They provide a lot of movement speed which is well received on Ember, and increase your farming speed hugely, as well as allow you to be quicker to fights, splitpush easier, and they allow you to do the TP-Remnant trick without having the constantly buy Ember Spirit. They provide a lot of movement speed which is well received on Ember, and increase your farming speed hugely, as well as allow you to be quicker to fights, splitpush easier, and they allow you to do the TP-Remnant trick without having the constantly buy  Town Portal Scroll (and on a shorter cooldown), which in conjunction with a Town Portal Scroll (and on a shorter cooldown), which in conjunction with a  Bottle will allow you to heal up and return to lane quickly. Part of the reason that Bottle will allow you to heal up and return to lane quickly. Part of the reason that  Phase Boots is not the best choice on Ember is simply because these boots exist - we only really want to get Phase when we are dominating, but if that's the case then we may as well just go for BoT's as they benefit us much more. While this pair of Boots is more expensive than the others, the increase in farming and pressuring ability compensates for that easily. Although we lack stats, the increased movement speed does increase our survivabilty in a multitude of ways, as well as the more frequent fountain trips allow us to keep topped off on MP/HP at all times, making up for these set-backs. Additionally, Phase Boots is not the best choice on Ember is simply because these boots exist - we only really want to get Phase when we are dominating, but if that's the case then we may as well just go for BoT's as they benefit us much more. While this pair of Boots is more expensive than the others, the increase in farming and pressuring ability compensates for that easily. Although we lack stats, the increased movement speed does increase our survivabilty in a multitude of ways, as well as the more frequent fountain trips allow us to keep topped off on MP/HP at all times, making up for these set-backs. Additionally,  Boots of Speed recently recieved a nerf of -5 movement speed, translating to -5 movement speed for all Boots,except Travels. So arguably this is an indirect buff to Travels. Boots of Speed recently recieved a nerf of -5 movement speed, translating to -5 movement speed for all Boots,except Travels. So arguably this is an indirect buff to Travels.
|
Battle Fury Timing
Usually you'd want to be picking up your
 Battle Fury
 after upgrading
 Boots of Speed
 into either
 Power Treads
 or
 Boots of Travel
, and after your
 Ring of Aquila
. Depending on how the game is going, and on which choice of Boots you made, a good timing would be anywhere in between 18-25 minutes. Later than that is not terrible, but something probably went wrong along the way.
Battle Fury timing may differ if you didn't build it as your first item after Boots, which may happen some games. If this is the case, and you are going to be getting a Battle Fury, try to make sure you get it not much more than 5-6 minutes after your latest item.
I would recommend buying
 Quelling Blade
 as the first component of Battle Fury (swapping out the
 Poor Man's Shield
 if you've gone for
 Power Treads
 and need the
 Town Portal Scroll
 slot open), as it will greatly increase your farm rate, especially with
 Boots of Travel
, and help you on your way to the Battle Fury. If you're fighting an excessive amount, going for the
 Perseverance
 first may be a better choice, however.
Situational Items
Alright, so this will be the longest part of this section by far. There are actually a ton of items which are situationally viable on Ember, and they will each be listed here with there function and reasoning. Disclaimer: The key-word here is situational. The point of this is not to try and persuade you to go and build unconventional items in games where it's unnecessary - it's to show and explain that you have options, and how to adapt when you need to. Some of these items are more situational and less/more viable than others, and remember they are listed in no particular order. That being said, be sure not to disregard certain items just because they cater to a more uncommon/specific situational usage.
|
|

|
|
Abyssal Blade is an item which... well, we'll basically never buy on this Hero. But sometimes, it can be just what you need. It's gotten solely for the  Black King Bar piercing disable, the physical damage mitigation, HP, and passive chance to bash just come as a bonus (although nice ones!). Keep in mind - Abyssal Blade can be used during Black King Bar piercing disable, the physical damage mitigation, HP, and passive chance to bash just come as a bonus (although nice ones!). Keep in mind - Abyssal Blade can be used during  Sleight of Fist, allowing you to jump to the enemy and Abyssal them, however it's near impossible to do consistently witout Quickcast enabled. Also note that the passive bash has a 2.3 second cooldown, so you wont be bashing all of your Sleight of Fist targets; tough luck. Sleight of Fist, allowing you to jump to the enemy and Abyssal them, however it's near impossible to do consistently witout Quickcast enabled. Also note that the passive bash has a 2.3 second cooldown, so you wont be bashing all of your Sleight of Fist targets; tough luck.
|
|
|

|
|
Black King Bar is sort of a last resort item. You dont want to get it, but if you really must, it's not the end of the world. However contrary to only being used defensively as it is on some Heroes, on  Ember Spirit your BKB can help you become more aggressive in fights and really get in there to do some damage. Recommended if you're facing a lot of AoE stuns and silences. Ember Spirit your BKB can help you become more aggressive in fights and really get in there to do some damage. Recommended if you're facing a lot of AoE stuns and silences.
|
|
|

|
|
Ah, Blink Dagger. This fancy blue blade isn't just for style points - it comes in quite useful on our fiery friend. Often, especially later into the game, you will not want to be using your  Fire Remnant aggressivly, since you will want to have one ready to jump out to. This is where Blink comes in. It replaces the need for aggressive Remnants and allows for amazing chasibility, and a good re-positioning tool to position yourself correctly for the perfect Fire Remnant aggressivly, since you will want to have one ready to jump out to. This is where Blink comes in. It replaces the need for aggressive Remnants and allows for amazing chasibility, and a good re-positioning tool to position yourself correctly for the perfect  Sleight of Fist or Sleight of Fist or  Searing Chains. Keep in mind - you can Blink during both Searing Chains. Keep in mind - you can Blink during both  Activate Fire Remnant and Activate Fire Remnant and  Sleight of Fist, but if done so during the duration you will still end up in the location of the SoF or Remnant respectively. Sleight of Fist, but if done so during the duration you will still end up in the location of the SoF or Remnant respectively.
|
|
|

|
|
While I'm not a huge fan of Desolator in general, sometimes the item absolutely demolishes teams. The minus armour will be applied to each target before the damage is dealt, so when using  Sleight of Fist, a considerable amount of bonus damage is applied. Desolator is also very cost efficient damage and is good as an early pickup for good damage, quickly. It also helps with taking objectives such as towers and Roshan, which is usually one of your weak points. Since armour does not scale linearly, Deso is best picked up against teams with high hp/low armour Heroes to get most damage out of the minus armour - against Strength Heroes is a good example. Make sure to pick up the Blight Stone first, and early, if you plan to build Desolator. Keep in mind - Desolator will fall off later into the game, and does not stack with Sleight of Fist, a considerable amount of bonus damage is applied. Desolator is also very cost efficient damage and is good as an early pickup for good damage, quickly. It also helps with taking objectives such as towers and Roshan, which is usually one of your weak points. Since armour does not scale linearly, Deso is best picked up against teams with high hp/low armour Heroes to get most damage out of the minus armour - against Strength Heroes is a good example. Make sure to pick up the Blight Stone first, and early, if you plan to build Desolator. Keep in mind - Desolator will fall off later into the game, and does not stack with  Eye of Skadi, which is another great item on Eye of Skadi, which is another great item on  Ember Spirit Ember Spirit
|
|
|

|
|
Diffusal Blade on  Ember Spirit..? Really..? Well, yes actually. Not only is it cost efficient agility that provides a lot of damage and armour, but the active, Purge, is exactly what you need when playing against one of Ember's stronger counters - Ember Spirit..? Really..? Well, yes actually. Not only is it cost efficient agility that provides a lot of damage and armour, but the active, Purge, is exactly what you need when playing against one of Ember's stronger counters -  Omniknight. The Purge can also come in handgy against Heroes with purgable self-buffs! Keep in mind - if you're not picking this up primarily for the Purge, you shouldn't really be picking it up at all. Omniknight. The Purge can also come in handgy against Heroes with purgable self-buffs! Keep in mind - if you're not picking this up primarily for the Purge, you shouldn't really be picking it up at all.
|
|
|

|
|
Eul's Scepter on  Ember Spirit seems a little strange at first glance, but it can come in very useful. Not only can it be used to Purge silences from yourself, but the mana regen and movement speed allow you to farm much faster. The active can also help set up your Ember Spirit seems a little strange at first glance, but it can come in very useful. Not only can it be used to Purge silences from yourself, but the mana regen and movement speed allow you to farm much faster. The active can also help set up your  Searing Chains if they are on cooldown and you need a second for them to be ready! While it's true that Searing Chains if they are on cooldown and you need a second for them to be ready! While it's true that  Manta Style can Purge as well, when behind, a Euls is perfect because it's much much cheaper, speeds up our farm, and adds some utility to our team. If you keep dying to that Manta Style can Purge as well, when behind, a Euls is perfect because it's much much cheaper, speeds up our farm, and adds some utility to our team. If you keep dying to that  Storm Spirit with his Storm Spirit with his  Orchid Malevolence, you're never going to get enough money for the Manta.. but you may have enough for Euls! Keep in mind - Euls doesn't give you any damage, and while it's good very situationally, only get it if you really need it. Orchid Malevolence, you're never going to get enough money for the Manta.. but you may have enough for Euls! Keep in mind - Euls doesn't give you any damage, and while it's good very situationally, only get it if you really need it.
|
|
|

|
|
Single-Target disables are your worst enemy. Even more so, instant disables such as  Hex, Hex,  Doom, Doom,  Duel etc which lock you down for a significant amount of time - and can't be dodged. In this case, Linken's Sphere is here to save the day! Pretty much a go to item if you need that one crucial disable to be blocked, and the stats are pretty nice on him too. +15 all attributes and some nice HP and MP regen are always welcomed. Keep in mind against Doom and Duel especially that that neither of the Heroes that use them have any other spells that can break Linken's, so it's a very good pick-up against them. If they want to break it buy themselves, they will have to purchase an item such as Duel etc which lock you down for a significant amount of time - and can't be dodged. In this case, Linken's Sphere is here to save the day! Pretty much a go to item if you need that one crucial disable to be blocked, and the stats are pretty nice on him too. +15 all attributes and some nice HP and MP regen are always welcomed. Keep in mind against Doom and Duel especially that that neither of the Heroes that use them have any other spells that can break Linken's, so it's a very good pick-up against them. If they want to break it buy themselves, they will have to purchase an item such as  Force Staff or Force Staff or  Eul's Scepter of Divinity in order to do so. Eul's Scepter of Divinity in order to do so.
|
|
|

|
|
Manta Style is pretty much our go to item when playing against Heroes with silences, for example  Storm Spirit who is commonly picked as a counter to Storm Spirit who is commonly picked as a counter to  Ember Spirit, along with Ember Spirit, along with  Silencer, Silencer,  Drow Ranger, Drow Ranger,  Death Prophet, Death Prophet,  Puck.. you get the idea. Not only can Manta be used to purge silences, but we can also dodge projectiles with it, and it gives great stats. It has a pretty good build up, and the Puck.. you get the idea. Not only can Manta be used to purge silences, but we can also dodge projectiles with it, and it gives great stats. It has a pretty good build up, and the  Yasha works wonders on Ember allowing him to farm faster and be more mobile. Yasha works wonders on Ember allowing him to farm faster and be more mobile.
|
|
|

|
|
I rarely ever find myself picking up Maelstrom, but it would be wrong to completely disregard it. I'm not a fan of the item myself, but sometimes it can be what you need when you're behind and you can get it for much cheaper than a  Battle Fury. The main reason you'd want to do so is not to increase farmrate (although it does, there are better items for that), but to do more AoE damage with your Battle Fury. The main reason you'd want to do so is not to increase farmrate (although it does, there are better items for that), but to do more AoE damage with your  Sleight of Fist earlier on into the game. It's also good against teams with high armour, since the chain lightning will do magic damage - which is especially relevant since the 6.87 Sleight of Fist earlier on into the game. It's also good against teams with high armour, since the chain lightning will do magic damage - which is especially relevant since the 6.87  Armlet of Mordiggian buffs. Upgrading to Armlet of Mordiggian buffs. Upgrading to  Mjollnir is usually unnecessary, as the added attack speed and active don't do much for you - and if the game goes that late you'd be better off replacing the Maelstrom with another item. Mjollnir is usually unnecessary, as the added attack speed and active don't do much for you - and if the game goes that late you'd be better off replacing the Maelstrom with another item.
|
|
|

|
|
Pretty self explanatory, you get this if you're suffering from the enemy team having a lot of evasion. Mainly if you find yourself playing against  Phantom Assassin, as you really need your Phantom Assassin, as you really need your  Sleight of Fist attacks to hit her. Keep in mind - there's no reason to get this if the enemy does not have evasion; if it's only the damage you're after, a second Sleight of Fist attacks to hit her. Keep in mind - there's no reason to get this if the enemy does not have evasion; if it's only the damage you're after, a second  Daedalus would be better. That being said, since the mini-bashes from MKB have been changed over the last few patches to do a lot of magical damage, an argument could be made that MKB is quite good against high armour line-ups. Daedalus would be better. That being said, since the mini-bashes from MKB have been changed over the last few patches to do a lot of magical damage, an argument could be made that MKB is quite good against high armour line-ups.
|
|
|

|
|
If you honestly have nothing else you need to spend gold on, all the  Divine Rapiers you could ever ask for, and 4000 extra gold; go ahead and buy a Moon Shard. Why not. Divine Rapiers you could ever ask for, and 4000 extra gold; go ahead and buy a Moon Shard. Why not.
|
|
|

|
|
While it sounds pretty silly at first.. ok, well it is sort of silly. But Octarine Core actually does some interesting stuff for  Ember Spirit. Apart from lowering the cooldowns of his abilities which is always good, especailly for Ember Spirit. Apart from lowering the cooldowns of his abilities which is always good, especailly for  Sleight of Fist, Octarine Core will grant lifesteal based on all the damage dealt via Sleight of Fist, Octarine Core will grant lifesteal based on all the damage dealt via  Battle Fury cleave, but not Sleight of Fist's bonus damage (so the +20, 40, 60, 80 extra damage applied to your attacks from SoF). If you're hitting stupidly hard (and you've basically won the game anyway), this can provide a fairly hefty chunk of burst-lifesteal for Ember. Additionally, it lowers the Replenish time on his Battle Fury cleave, but not Sleight of Fist's bonus damage (so the +20, 40, 60, 80 extra damage applied to your attacks from SoF). If you're hitting stupidly hard (and you've basically won the game anyway), this can provide a fairly hefty chunk of burst-lifesteal for Ember. Additionally, it lowers the Replenish time on his  Fire Remnants. Keep in mind - I am not recommending that you buy this item. I'm just saying you can buy this item. All that being said, Octarine Core certainly does have some potential in the Ultra Late Game when in combination with Fire Remnants. Keep in mind - I am not recommending that you buy this item. I'm just saying you can buy this item. All that being said, Octarine Core certainly does have some potential in the Ultra Late Game when in combination with  Divine Rapier's, especially when defending against Mega-Creeps. Divine Rapier's, especially when defending against Mega-Creeps.
|
|
|

|
|
Honestly, not enough  Ember Spirit players build this item. And this is a mistake - because it's good. Everything Orchid provides, Ember benefits from. The attack speed is great, the mana and mana regen is great, and the active allows you to play aggressively without fear of the enemy turning around and using a spell on you. It is situational, but you may actually find yourself in just that situation quite often. The main reason to get this is obviously the active - and this active is just what you need when playing against Ember Spirit players build this item. And this is a mistake - because it's good. Everything Orchid provides, Ember benefits from. The attack speed is great, the mana and mana regen is great, and the active allows you to play aggressively without fear of the enemy turning around and using a spell on you. It is situational, but you may actually find yourself in just that situation quite often. The main reason to get this is obviously the active - and this active is just what you need when playing against  Storm Spirit! As I said before, Storm is often picked to counter Ember, but with a good early game, you can likely get an Orchid before he does and shut him down before he gets his. It's also good against other Heroes with escape skills that you want to shut down early, for example Storm Spirit! As I said before, Storm is often picked to counter Ember, but with a good early game, you can likely get an Orchid before he does and shut him down before he gets his. It's also good against other Heroes with escape skills that you want to shut down early, for example  Anti-Mage, Anti-Mage,  Queen of Pain, or Queen of Pain, or  Puck. Your Puck. Your  Searing Chains will help here too, but sometimes you just need that little bit extra. If you haven't yet tried Orchid Ember, you really should. Searing Chains will help here too, but sometimes you just need that little bit extra. If you haven't yet tried Orchid Ember, you really should.
|
|
|

|
|
Good stats, and some movement speed. Never really a bad pick up, the only thing to watch out for is when there is a much better pick up - which there often will be. But if you've established a lead, or on the other hand are behind and need of some cheap(ish) stats, then Sange and Yasha may just help you out. The  Yasha also allows you to farm faster. Yasha also allows you to farm faster.
|
|
|

|
|
Ghost Scepter is a defensive pick-up which will help you deal with heavy physical damage dealers, such as  Phantom Assassin, Phantom Assassin,  Clinkz, and so on. If you're having trouble and getting caught out by these Heroes, this item is a very good pick-up. It's also good against Clinkz, and so on. If you're having trouble and getting caught out by these Heroes, this item is a very good pick-up. It's also good against  Storm Spirit if you are unable to afford a Storm Spirit if you are unable to afford a  Eul's Scepter of Divinity or a Eul's Scepter of Divinity or a  Manta Style, as even with Manta Style, as even with  Orchid Malevolence, Storm relies heavily on his right clicks to kill you, and if he can't do that, you should be safe! Never ever undervalue or underestimate the usage of this item, it's very affordable at only 1500 gold, and will definitely pay for itself with the number of times it saves your life. Keep in mind - Be careful about picking this up against Heroes like the aforementioned Clinkz, and especially Rikimaru, as it is not uncommon for these Heroes to buy a Orchid Malevolence, Storm relies heavily on his right clicks to kill you, and if he can't do that, you should be safe! Never ever undervalue or underestimate the usage of this item, it's very affordable at only 1500 gold, and will definitely pay for itself with the number of times it saves your life. Keep in mind - Be careful about picking this up against Heroes like the aforementioned Clinkz, and especially Rikimaru, as it is not uncommon for these Heroes to buy a  Diffusal Blade, which can purge the ethereal form from you. Diffusal Blade, which can purge the ethereal form from you.
|
|
|

|
|
Can be combined with  Desolator for a very early-to-mid game orientated Desolator for a very early-to-mid game orientated  Ember Spirit. With this kind of build you likely will be skipping out on Ember Spirit. With this kind of build you likely will be skipping out on  Battle Fury and will want to push, push, push! While very strong early on, this build will taper off into the later stages of the game. Keep in mind - even if going for an early-to-mid game orientated Ember build, try and avoid buying this if you have another natural Vlad's carrier on your team. Battle Fury and will want to push, push, push! While very strong early on, this build will taper off into the later stages of the game. Keep in mind - even if going for an early-to-mid game orientated Ember build, try and avoid buying this if you have another natural Vlad's carrier on your team.
|
|
|

|
|
Satanic does what it does. It provides some more HP for him in general, and when used in conjunction with  Sleight of Fist will heal you up pretty damn quickly. It's a rare pick-up, but you'll never know when you need it, especially when you find yourself getting caught out and brought down often without the option to back off. This means in fights where you must be present - a perfect example, is in the situation that you get caught out, almost killed, but your allied Sleight of Fist will heal you up pretty damn quickly. It's a rare pick-up, but you'll never know when you need it, especially when you find yourself getting caught out and brought down often without the option to back off. This means in fights where you must be present - a perfect example, is in the situation that you get caught out, almost killed, but your allied  Enigma or Enigma or  Magnus jumps in to make a great Ultimate.. only for you to Remnant out and not be present for the fight. If this is occuring frequently or you foresee it occuring in your game, you might want to consider picking up a Satanic in order to be able to stay in the fight and heal up to full very quickly without having to back off. Personally, I think this item is a bit underrated, and feel that in some games it may even be a better replacement for Magnus jumps in to make a great Ultimate.. only for you to Remnant out and not be present for the fight. If this is occuring frequently or you foresee it occuring in your game, you might want to consider picking up a Satanic in order to be able to stay in the fight and heal up to full very quickly without having to back off. Personally, I think this item is a bit underrated, and feel that in some games it may even be a better replacement for  Eye of Skadi. Very rarely, though. Keep in mind - The build-up from Eye of Skadi. Very rarely, though. Keep in mind - The build-up from  Helm of the Dominator is also quite nice, as the Armour and Damage benefit you greatly. Also, make sure to use the active to stack Ancients with a dominated creep, as Ember can take them very easily later on with his Helm of the Dominator is also quite nice, as the Armour and Damage benefit you greatly. Also, make sure to use the active to stack Ancients with a dominated creep, as Ember can take them very easily later on with his  Battle Fury and Sleight of Fist! Battle Fury and Sleight of Fist!
|
|
|

|
|
The go to orb-effect for  Ember Spirit. Skadi is brilliant on this Hero, the stats are great and applying the slow to 5 people in a fight is big. There comes a point in teamfights (especially if they are hitting your rax) where you simply cannot sit on the edge of the fight and spam Ember Spirit. Skadi is brilliant on this Hero, the stats are great and applying the slow to 5 people in a fight is big. There comes a point in teamfights (especially if they are hitting your rax) where you simply cannot sit on the edge of the fight and spam  Sleight of Fist because you need to be active during those 6 seconds of cooldown, and Skadi gives you the stats to be able to do so without getting blown up in a matter of seconds. It provides him with great survivability, so even if you do get caught out, you can survive long enough for your team to aid you and help make a swift turn-around. The damage is also warmly welcomed. Sleight of Fist because you need to be active during those 6 seconds of cooldown, and Skadi gives you the stats to be able to do so without getting blown up in a matter of seconds. It provides him with great survivability, so even if you do get caught out, you can survive long enough for your team to aid you and help make a swift turn-around. The damage is also warmly welcomed.
|
|
|

|
|
Multiple Daedali are sometimes the way to go. No item (aside from  Divine Rapier) will be providing you with more damage, and more damage is what you need. The increased chance to crit also makes your Divine Rapier) will be providing you with more damage, and more damage is what you need. The increased chance to crit also makes your  Sleight of Fist's that much deadlier. Or should I say, daedlier. Heh. Sleight of Fist's that much deadlier. Or should I say, daedlier. Heh.
|
|
|

|
|
While usually one Battle Fury should suffice, sometimes a second one can be just what you need. When hitting multiple clumped up targets, having an extra Battle Fury ends up dealing more damage than having an extra  Daedalus, for example. Maybe against Heroes such as Daedalus, for example. Maybe against Heroes such as  Meepo, Meepo,  Phantom Lancer, or Phantom Lancer, or  Chaos Knight, a second Battle Fury may be what will win you the game. However, as a general rule, I would not recommend stacking Fury's in most games. Keep in mind - try and pay attention to if most of your damage is coming from your Chaos Knight, a second Battle Fury may be what will win you the game. However, as a general rule, I would not recommend stacking Fury's in most games. Keep in mind - try and pay attention to if most of your damage is coming from your  Sleight of Fist's or if you're able to get in and deal just as much with regular right clicks. If so, another item may be better than the second Battle Fury. Sleight of Fist's or if you're able to get in and deal just as much with regular right clicks. If so, another item may be better than the second Battle Fury.
|
|
|

|
|
In the lategame, sometimes you just don't have enough damage. Divine Rapier is an absolutely excellent item on Ember as it provides insane amounts of damage when  Sleight of Fist-ing. In combination with a Sleight of Fist-ing. In combination with a  Daedalus and Daedalus and  Battle Fury, getting a 5 man wipe in one swift SoF is always possible. Keep in mind - Make sure to not get caught out and sit back so you can get off your Sleight of Fist. Getting caught out and losing the Rapier can be game losing... Battle Fury, getting a 5 man wipe in one swift SoF is always possible. Keep in mind - Make sure to not get caught out and sit back so you can get off your Sleight of Fist. Getting caught out and losing the Rapier can be game losing...
|
|
|

|
|
Shadow Blade is not an item commonly bought on  Ember Spirit, due to it being a little bit gimmicky and overall not the best way to spend 2800 gold. However, there are some interesting interactions with Shadow Blade and Ember Spirit, due to it being a little bit gimmicky and overall not the best way to spend 2800 gold. However, there are some interesting interactions with Shadow Blade and  Sleight of Fist. If cast during the fade time of Shadow Blade, Sleight of Fist can be used to damage all targets within the selected AoE and applying the bonus damage from Shadow Blade to all of the targeted units, without breaking the invisibility of Shadow Blade (as you will be invisible upon end of SoF duration). This is pretty cool as it makes your SoF's hit a bit harder and leaves the enemy a little confused as to where you vanished all of a sudden - however, honestly, with 2800 gold you can find a better way to increase the damage of your SoF. The invisibility isn't really all that great on Sleight of Fist. If cast during the fade time of Shadow Blade, Sleight of Fist can be used to damage all targets within the selected AoE and applying the bonus damage from Shadow Blade to all of the targeted units, without breaking the invisibility of Shadow Blade (as you will be invisible upon end of SoF duration). This is pretty cool as it makes your SoF's hit a bit harder and leaves the enemy a little confused as to where you vanished all of a sudden - however, honestly, with 2800 gold you can find a better way to increase the damage of your SoF. The invisibility isn't really all that great on  Ember Spirit, and while attack speed is nice, buying a Shadow Blade is not the best way to get it. Keep in mind - This interaction does not work with Ember Spirit, and while attack speed is nice, buying a Shadow Blade is not the best way to get it. Keep in mind - This interaction does not work with  Silver Edge, as it was patched out pretty quickly due to applying break and 225 bonus damage to 5 Heroes would be broken as hell. This interaction only works with Shadow Blade, and not Silver Edge (making it even less viable). Silver Edge, as it was patched out pretty quickly due to applying break and 225 bonus damage to 5 Heroes would be broken as hell. This interaction only works with Shadow Blade, and not Silver Edge (making it even less viable).
|
|
|

|
|
I used to not be a fan of this item on  Ember Spirit - but recently, I've come to realize that it's actually quite strong in some games. Butterfly gives a lot of agility, which gives a fair bit of damage to Ember both via Ember Spirit - but recently, I've come to realize that it's actually quite strong in some games. Butterfly gives a lot of agility, which gives a fair bit of damage to Ember both via  Sleight of Fist and regular auto-attacks. It also gives a fair bit of attack speed, which is most certainly underrated on Ember Spirit, and greatly helps with pushing towers and manning up on Heroes. The armour and evasion also counters one of Ember's biggest foes- physical damage. A lot of people will tell you the evasion is wasted on Ember but that's certainly not true. Just make sure you're adapting your playstyle to get more into fights and be less afraid of manning up on physical damage cores! Another thing, is the active; Flutter. Flutter is actually incredibly strong on Ember, the increase in movement speed is pretty crazy and along with the Sleight of Fist and regular auto-attacks. It also gives a fair bit of attack speed, which is most certainly underrated on Ember Spirit, and greatly helps with pushing towers and manning up on Heroes. The armour and evasion also counters one of Ember's biggest foes- physical damage. A lot of people will tell you the evasion is wasted on Ember but that's certainly not true. Just make sure you're adapting your playstyle to get more into fights and be less afraid of manning up on physical damage cores! Another thing, is the active; Flutter. Flutter is actually incredibly strong on Ember, the increase in movement speed is pretty crazy and along with the  Boots of Travel build make you farm/split-push like an absolute monster, as well as making you impossible to run away from/chase down. Trust me, do NOT underestimate how good this is. In some ways, Butterfly can be considered an alternative to Boots of Travel build make you farm/split-push like an absolute monster, as well as making you impossible to run away from/chase down. Trust me, do NOT underestimate how good this is. In some ways, Butterfly can be considered an alternative to  Eye of Skadi that focuses more against Physical damage in terms of tankability, and a better Eye of Skadi that focuses more against Physical damage in terms of tankability, and a better  Yasha in terms of farming. You can find a video where I talk about Butterfly Here. Keep in mind - Butterfly is quite a greedy item choice and you really need to know what you're doing to make best use of this. If you want this for the survivability alone, remember that Skadi will usually do better for you. Yasha in terms of farming. You can find a video where I talk about Butterfly Here. Keep in mind - Butterfly is quite a greedy item choice and you really need to know what you're doing to make best use of this. If you want this for the survivability alone, remember that Skadi will usually do better for you.
|
Laning
 Ember Spirit can be played in all three of the lanes, whether it be offlane, safelane, or midlane. While weak in lane in some aspects, in the right situation, and played correctly, Ember can also have quite the edge in lane. Important aspects of laning will include your starting items, and progression from there on, understanding Embers strengths in lane, and understanding how to make the most out of your lane in general, as well as finally laning partners. Additionally, near the beginning of each lane section there will be a small sentence stating whether this lane is better for Radiant/Dire Ember, but don't worry to much about this, it's mostly very small differences - just because it may be slightly better on one side of the map, doesn't mean you can't pick it for the other, etc.
This section will be broken up into three parts, Midlane, Safelane, and Offlane, each including all of the aforementioned points.
Midlane
As
 Ember Spirit
, the lane we find oursevles most often in is the Midlane. I've already covered itemization for Midlane a little in the earlier sections, but there are a few things I didn't already mention. Mid lane Ember Spirit is best on
Radiant, but is also good on
Dire.
As a melee Hero with low base armour,
 Poor Man's Shield
 (or at least a
 Stout Shield
) is our best friend. Even against magic harass heavy opponents such as
 Zeus
Zeus,
 Skywrath Mage
, or
 Leshrac
, the physical damage mitigation is still important, as we will often be drawing the aggro from Creeps, and having a PMS here is important. If possible we want to have two
 Tango (Shared)
s, so that we can go ahead and buy ourselves two
 Iron Branch
es, or one Branch, and a
 Faerie Fire
. However we can also buy our own
 Tango
Tangos at the cost of our GG Branches. In lanes we expect to get heavily harassed or constantly nuked, consider ferrying out a
 Healing Salve
 as it will allow you to sustain in lane better.
Against Heroes that harass mostly with spells (as mentioned before), well, thankfully we have
 Flame Guard
 to help with that. However, constantly spamming it is fairly mana heavy before
 Bottle
, and it is often on cooldown. A good solution here is to start out with a
 Magic Stick
 and a
 Stout Shield
 instead of a fully upgraded
 Poor Man's Shield
. This also leaves us with 100 spare gold which can be used to ferry out a
 Healing Salve
 early in the laning stage, or get a quicker Bottle. We can put a value point in
 Sleight of Fist
 in order to dodge some spell spam such as
 Powershot
,
 Arc Lightning
,
 Shadow Strike
,
 Lightning Storm
,
 Dragon Slave
 and more,
while still gaining stick charges from them! This means that you're essentially getting stick charges for free at the cost of only 50 mana - which is replenished over time by your stick. The decision you need to make here is whether the HP or the MP is more important to reserve, and which will hurt you more. For example, against Arc Lightning you may as well just tank it and save the mana - but against a heavier damaging nuke such as Lightning Storm or Dragon Slave, dodging it will benefit you more as otherwise you'd lose a sizable chunk of health.
Against lanes where you are having trouble farming, make sure to draw the creep aggro to you to pull the creeps closer to your tower/side of the river. You can do this buy right-clicking on the enemy Hero while close to the creeps, and then running back so that the creeps follow you back (you dont need to attack the Hero, you only need to right click on him as if you were going to attack).
 Flame Guard
 is also a valuable tool for farming, and it helps you secure some last hits as well as harass the enemy out of lane by simply manning up on them along with your
 Searing Chains
.
Against lanes where you have an advantage, you want to make sure to get your
 Bottle
 and
 Boots of Speed
 as soon as possible and go on the aggressive on the enemy midlaner. Harass him, push him out of lane, deny his farm, and kill him if possible. Make sure he knows you mean business, and that you are stronger than him, to keep him playing back. Also use this to secure runes for yourself. When going for a kill with
 Searing Chains
 make sure to walk to the
side of the creepwave, or as far past it as possible in order to have as few creeps in the AoE of your chains as possible, to ensure that you can reliably chain the enemy midlaner. It is important to not start attacking/right-clicking on the enemy until you have chained them, because otherwise you will draw creep aggro and the creeps will follow you, messing up your chances of successfully hitting your chains (this does not apply if you are already past the creepwave and only the ranged creep is in the AoE).
As soon as you're 6, you can start playing more aggressively and push down the tower by cutting waves behind the mid tier 1, as well as gank otherlanes quite well. Make sure to become active once you are 6 or 7, to assert your dominance and maintain a lead.
In terms of dual mids, often you want the solo lane as
 Ember Spirit
, but sometimes against an enemy dual mid, pairing up with an
 Io
Io, or
 Lich
Lich in the midlane can benefit you greatly, with
 Tether
 and
 Overcharge
 allowing Ember to play aggressive with
 Flame Guard
 and have the extra movement speed in order to get a good
 Searing Chains
, and with Lich, the
Ice Armor buffing up Ember to help with his low armour issue, and
 Frost Blast
 slowing enemies enough for an easy Chains. 9 times of out 10 however, you'll probably be solo mid.
Safelane
Coming in second place to the Midlane,
 Ember Spirit
 may often find himself residing in the Safelane. While being much the same as the Midlane, as Safelane Ember you will often have a strong advantage and can play very aggressively early on, especially against solo offlaners. You are also often able to secure more farm this way. Safelane Ember is best on
Dire, but is also very good on
Radiant.
Since we will be playing forward, we will want to make sure we have a
 Stout Shield
 in our starting items, like always. We wont be getting shared
 Tango
Tangos here, so we buy our own set along with a
 Healing Salve
,
 Enchanted Mango
, and one
 Iron Branch
 for stats. We will upgrade our Stout Shield into a
 Poor Man's Shield
 in the sideshop as soon as possible, and get
 Boots of Speed
 as our first item. With a PMS and Boots, along with some good regeneration, we want to make this lane as scary as possible for the enemy offlaner. Especially when laning against melee offlaners, position yourself at the side or in the middle of the creep wave rather than behind it, so the offlaner has to put himself at risk in order to get farm. Pull the creep wave back in the same way as you would in midlane, and deny heavily to keep the creepwave under your tower so that the enemy offlaner has a very hard time getting farm or EXP.
If the offlaner does try and come close and get some farm, you can react by popping your
 Flame Guard
 and
 Searing Chains
. If hes far enough down the lane, with your
 Boots of Speed
 and Flame Guard active you can often simply run him down before he can escape, simply keeping up beside him with your Flame Guard on and attacking him when you can. With a support that has either a heavy slow or a stun, this becomes even easier and makes for a very scary lane for most offlaners. Some examples of good supports for laning with an
 Ember Spirit
 like this would be;
 Dazzle
,
 Earthshaker
,
 Vengeful Spirit
,
 Crystal Maiden
, and
 Winter Wyvern
.
 Bottle
 is pretty core on
 Ember Spirit
 no matter what lane we're in, but we dont need to get it as early in the safelane. We can go ahead and get our Boots, maybe followed by a
 Ring of Basilius
 first. If we are successfully winning our lane, after clearing a creep wave in lane we can move to the easy or medium camp closest to the safelane and clear it with
 Flame Guard
 and
 Searing Chains
 if it hasn't been pulling by the support. We should be able to clear either one of these camps and make it back to lane without missing more than one (or maybe two) creeps from the wave. Dire safelane is especially good for this, as the hard camp is literally right beside the lane. We can simply cut down a tree to create a chokepoint (so we take less damage), and farm it with Flame Guard before the next creepwave comes, and we shouldn't need to sacrifice any last hits from the oncoming wave. This actually gives Ember quite a significant advantage in the Dire safelane as opposed to the Radiant Safelane, so keep this in mind! However that being said, with the recent
6.86 map changes, the Radiant medium is much closer to the lane, and potentially could be farmed similarly to that of Dire.
Once we are 6 or 7, we want to try and push down the tower and become active elsewhere on the map. Although we are taking the Safelane position, we do not want to spend all our time sitting and farming, after winning our lane we become active in other lanes such as the offlane or even midlane by ganking heavily and transitioning into early pushing or early fighting with your team.
In the rare occasion that you lose the safelane (for example if against aggressive dual/trilanes, with Heroes such as
 Axe
Axe, or
 Dark Seer
), then we want to try and stay under tower and soak up what EXP we can get, and farm jungle camps with
 Flame Guard
 and
 Searing Chains
 whenever possible, and wait for our supports/offlaner/mid to gank or become active in another lane as a team.
Offlane
Although rarely seen occupying this lane,
 Ember Spirit
 can work well with either an aggressive dual/trilane in the Offlane. Because of his aggressive and active nature of his playstyle, with a good aggro trilane we can really make life hell for the enemy safelane. Note that Ember in the Offlane only really works out with dual lanes or an aggro tri, and solo Offlane Ember is not something I'd recommend. Dual/Tri offlanes with Ember Spirit significantly better on
Radiant.
We're going to be playing very aggressively and very forward, which in the Offlane is far riskier than in the Safelane, so we're going to buy
lots of regen. Starting off with our usual
 Stout Shield
, we buy ourselves
two sets of
 Tango
Tangos and a
 Healing Salve
, and one
 Iron Branch
 with our remaining gold. As soon as we can, we'll upgrade our Stout into a
 Poor Man's Shield
. We want to pick up a
 Magic Stick
 early on as a lot of things will likely happen in this lane and the regen will often come in useful. After
 Boots of Speed
, we'll want to get a
 Ring of Basilius
 for the extra armour and pushing potential as well as the mana regen.
 Power Treads
 and
 Bottle
 (and if rich enough,
 Ring of Aquila
), will follow soon after.
We want to be playing aggressive with our
 Flame Guard
 and
 Searing Chains
 pushing the enemy laner out of lane. This works best against melee cores (
 Anti-Mage
,
 Phantom Lancer
), or ranged cores with bad armour and attack animation (
 Drow Ranger
,
 Clinkz
). Obviously, this doesn't work with just an
 Ember Spirit
, so we need to make sure we have a good laning partner.
Combined with
 Ember Spirit
's good damage over time and lockdown with
 Searing Chains
 and
 Flame Guard
, heroes such as
 Undying
 work wonders.
 Tombstone
 and
 Decay
Decay allow the two to run down Heroes quite well and create havoc in the lane, as well as
 Soul Rip
 being a good "oh **** this was a bad idea we need to get back"-situation spell.
 Pugna
Pugna also works well here, with his
 Decrepify
 and
 Nether Blast
, slowing enemies down and dealing large amounts of damage in conjunction with Chains and Flame Guard. All three of those together makes for a pretty scary lane. A mention should also go to
 Lich
Lich, who with his
 Frost Blast
 can nuke and slow enemies greatly allowing for easy chains and an easy kill, and with his
Ice Armor can help buff up the low-armour
 Ember Spirit
 so he can go on the aggressive with more success.
We can also contest the enemy supports pulls well with
 Flame Guard
, steal the all the last hits and potentially even get a free kill with
 Searing Chains
 - just make sure your lane partner is there to back you up and assist.
Ganking
 Ember Spirit is a very strong ganking Hero, especially once you hit level 6 or 7 and have. Once you have at least three points in
  Searing Chains, ganking becomes a whole lot easier and more successful.
Here's Embers two most comon basic combos when ganking. They can be adapted and done in a variety of orders, of course, but whats more important is knowing why we use each spell when we use it.
Example 1.
OR...
Example 2.
Example 1.
- Open by throwing down a
 Fire Remnant in a safe area.
- Activate
 Flame Guard and engage on the target.
- When close enough,
 Sleight of Fist the target.
- Use
 Searing Chains during SoF to chains the target.
- Run up to the target and finish them off.
- Disengage/escape to Remnant from Step 1, with
 Activate Fire Remnant.
Tips:
- Make sure to activate
 Flame Guard before engaging so you don't waste time casting it instead of autoattacking your chained target.
- When using
 Sleight of Fist, position it so that only the target gets caught in the AoE. This prevents us from jumping to the wrong target and chaining them instead.
- Don't disengage immediately if you can get another kill/farm a creep wave. It's primarly a safety remnant.
Example 2.
- Open by throwing a
 Fire Remnant at the target.
- Cast
 Flame Guard during the time that the Remnant is traveling.
- Use
 Activate Fire Remnant to jump to Remnant and close gap to target.
- Immobilize the target with
 Searing Chains, and attack.
- Utilize your
 Sleight of Fist in order to finish off the target, or dodge a spell.
Tips:
- Make sure to try and throw the
 Fire Remnant into the targets path to increase its chance of damaging him as well as closing gap better.
- Make sure to cast
 Flame Guard while your Remnant is travelling, as it needs a brief moment to reach its destination anyway and you waste no time casting Flame Guard earlier.
- You can use
 Searing Chains while travelling to your Remnant, so make sure to Chains the target as soon as you are within range, even while travelling with Remnant.
- Try and conserve
 Sleight of Fist either to guarantee the last hit or until the target is no longer within autoattack range.
Example 1. VS Example 2.
In the first method, we rely on
 Sleight of Fist
 as our gap closer for
 Searing Chains
 rather than using
 Fire Remnant
. This allows us to have a very reliable chains, and makes sure that we have an escape mechanism if things go pear-shaped. However, we sacrifice the damage from remnant, spend more time walking rather than just autoattacking, and our SoF will likely be on cooldown if the enemy manages to get away with 1 hp.
In the second method, we rely on
 Fire Remnant
 to close the gap between us and get our
 Searing Chains
 off. This allows to to deal more damage through the Remnant, and we will spend less time traveling towards our target, so we can attack him more while he's chained. We also reserve
 Sleight of Fist
 for when we need it, and we have it available to dodge a spell like a stun with. However, by opening with a
 Fire Remnant
, we sacrifice our escape mechanism and put ourself in more immediate danger. We become more vulnerable to
 Town Portal Scroll
 reactions from the enemy and have a higher risk of dying if things go wrong.
As a sort of mix between the two, you can try sending a
 Fire Remnant
 back as you jump to your fisrt one - this is possible since we can use abilities during
 Activate Fire Remnant
. It's a little tricky, but removes a lot of the downside to the second method. However, it requires quick fingers and more than 1 Remnant, which you may not always have.
Don't forget, when ganking, use the Fog of War to your advantage. Both of these methods will have a much higher success rate if the enemy doesn't see you coming until you're already on top of them.
 Ember Spirit
 can utilize this well, and can jump out from the fog with
 Fire Remnant
, or hide in the fog as an enemy crosses his path, in order to get an easy
 Searing Chains
 off on them.
Utilizing Runes
As a frequent purchaser of  Bottle, and often found in the Midlane,
  Ember Spirit's may find that they have a recurring interaction with Runes.. and knowing how to utilize them properly is important - not only in the Laning Phase, but also into the later portions of the game as well.
Below, you'll see a list of each rune in the game, with both what they do for Ember and how they should be utilized. The Runes will be listed from most ideal to least ideal pick-up (best to worst):

-
 Arcane Rune
 is probably the best Rune for Ember currently. The reduced cooldowns and mana-costs allow you to spam your spells for farming, and use your
 Boots of Travel
 more frequently, skyrocketing your farming speed during the Rune's duration. Since Arcane Rune lasts so long, you can easily get off multiple
 Flame Guard
's during it's duration. In addition to this, in the late game, the reduced cooldown on
 Sleight of Fist
,
 Fire Remnant
, and even
 Searing Chains
 makes this Rune a deadly pick-up, and can potentially win you fights. Make sure to use your SoF and Searing Chains combo whenever possible, as you needn't worry much about mana usage since it is reduced, and you can get out a lot more damage in a drawn out fight because of the cooldown reductions. Also, try and abuse the shorter cooldown of both Travels and Remnant to quickly push out lanes, and jump back to base, essentially pretending you're a
 Tinker
 with a..
 Radiance
..?

-
 Rune of Double Damage
 is another great Rune for Ember Spirit. If picked up during the Laning Phase, especially around Level 5-6, it can really help you secure a solo kill on the enemy Midlaner, even Heroes which it would have been otherwise impossible (or very difficult) to kill without the Rune. And of course, Double Damage is an absolutely terrifying Rune for an Ember to pick up in the Late game, as with a maxed out Sleight of Fist and a healthy dose of Daedali (
 Daedalus
), you'll carve through the opposition like a hot knife through butter. Make sure to hit as many targets with your SoF as possible, and use your
 Blink Dagger
 and
 Activate Fire Remnant
 to snag a cheeky kill on any low health Heroes before jumping back to safety.

-
 Rune of Haste
 becomes less useful as the game drags on, but is certainly a great Rune to find in the early-midgame. With a Haste Rune and your Ultimate,
 Fire Remnant
 you can easily play aggressively and potentially kill your lane opposition, even diving tower - with the easy escape mechanism of your
 Activate Fire Remnant
. Additionally, if you want to engage using a Remnant, they will travel at their maximum speed of 1305 UPS (Units Per Second), meaning you can jump to them immediately and still travel the full distance, as fast as possible. Make sure to use the advantage of maximum movement speed to position yourself correctly for a good
 Searing Chains
, and run the enemy down with
 Flame Guard
. Can also be used to gank another lane, just remember to leave a Remnant in your lane beforehand, so that after you secure a quick kill you can Remnant back to your lane for maximum efficiency!

-
 Rune of Invisibility
 is another Rune that is more beneficial in the early game, and again can be used to help gank, or secure a kill in your own lane. Used in conjunction with
 Flame Guard
, you can activate it during the fade time of the Rune, effectively making you an invisible-fireball, which enables you to both thoroughly spook your enemies, as well as get a few seconds of damage onto them without them noticing at first. When they do realize they're talking damage, you can lock them down with
 Searing Chains
, and try and get the kill. Also, keep in mind that because of the fade time of the Rune, you can use spells like
 Sleight of Fist
 as you fade, leaving you invisible once the Sleight finishes, similarly to
 Shadow Blade
's interaction. You can use this to confuse your enemies and help you escape, occasionally, or simply disorientate them during a teamfight.

-
 Rune of Regeneration
 is nice to pick-up on any Hero, especially when you're low.. however, as Ember Spirit, since we already have efficient Health/Mana management techniques through
 Bottle
 +
 Town Portal Scroll
 +
 Fire Remnant
, the value of the Rune is somewhat decreased. That being said, having a Regeneration Rune can allow you to play more aggressively in lane and trade hits more often, with the knowledge that you can heal up to full afterwards and remain in lane. Make sure to use your spells as the Rune heals you, so that you get as much as possible out of the Mana Regeneration. Even saving yourself one fountain trip because of a Regeneration Rune can greatly increase your efficiency, so make sure to get the most out of it. In addition, stumbling across a lucky regen rune into the later portions of the game when you otherwise would have needed to back is always great, and in some situations can turn a fight or allow you to take an objective you would have otherwise had to give up on.

-
 Rune of Illusion
 is not a Rune that Ember benefits greatly from in particular, but it certainly still has some usage and you should make sure to use the illusions, rather than just leaving them where they are. One cool trick you can do is use the illusions to Body-block your enemy as you chase them down - a technique not unique to Ember, but made easier by his
 Searing Chains
, which you can use to help position your illusions correctly for the block while your enemy is disabled, and your main Hero is attacking them. Additionally, apart from the obvious usage of scouting, you can use the illusions to sneak in between the Tier 1 and Tier 2 towers and draw the enemy creep-wave away while you push the Tier 1 with your creeps. This will help your push significantly, and with good micro you can draw the creeps into a nearby jungle camp (if safe), to help you farm both said creep-wave and jungle camp at the same time.

-
 Bounty Rune
, a Rune that no list would be complete without - though unfortunately often residing at the bottom (except in the case of say,
 Alchemist
). These Runes are always nice, a little boost in Gold and Experience, and more importantly a free bottle refill.. but apart from that, they don't really do much for you. That being said, picking up a Bounty Rune does indicate that the "Good Rune" or "Non-Bounty Rune" is at the other Rune-spot, and may have been picked up by an enemy looking to gank - and reminds you to notify or warn your allies just in case.
Teamfighting
 Ember Spirit is an excellent teamfighter throughout all stages of the game, however as the game progresses, he becomes more and more item dependent.
The number 1 absolute most important thing when it comes to teamfighting with Ember is positioning. Not just for the beginning of the fight, but all throughout, you must be careful how you position yourself.
Ideally, you will want the the enemy team to initiate, and for your team to counter-initiate. But, with good use of  Sleight of Fist and
  Fire Remnant, you can momentarily put yourself in a bad position, do some damage before jumping out. With this you may be able to draw the opposing team into an awkward position or bait out some important spells. Just be careful that you don't actually get caught out while doing this.
As the teamfight breaks out, make sure you are on the edge of the fights just behind your team, but not too far back. You need to watch out for important single-target disables such as  Flaming Lasso,
  Doom,
Doom,  Duel, etc. Once the teamfight breaks out, you want to be
  Sleight of Fist-ing as many targets as possible. If you see an opportunity to get a good
  Searing Chains off, make sure to do so with out putting yourself in too much danger. When you need to man-up and run straight into the fray, make sure you have your
  Flame Guard ready and pop it. While you don't to put yourself in too much danger, you shouldn't expect to escape with a scratch. Often you can be quite aggressive as long as you have a safety Remnant, so if the teamfight turns in your favour, make sure to get in there and get dirty. Since you have an insane amount of physical damage in the late game, try and make sure to burst down squishier targets right as the fight begins. This will instantly give your team the edge and allow you to play aggressively on the enemies more important cores.
Try not to use  Fire Remnants too much during fights, as (especially late game, putting yourself in an aggressive position without any means of escape can often result in your death. Of course, if you are clearly stronger and need to catch up to the lone survivor of the teamfight, you can use Remnants to help you here. Just don't do something stupid like throwing all three Remnants into the middle of a fight and then dying when you get disabled.
Farming/Splitpushing
This will be a much shorter section, but it's important nonetheless. As  Ember Spirit, we want to remain active on the map as much as possible. Therefore, when we are not fighting/ganking - we are farming/pushing!
Even before  Battle Fury,
  Ember Spirit can farm quite well with the use of his abilities.
  Flame Guard is what will mainly be used in order to farm jungle camps and push waves faster. Don't be afraid however, to use your other spells while farming, especially
  Sleight of Fist once you have a Battle Fury. If you have
  Power Treads, be sure to Treadswitch to Intelligence before casting every spell, and back to Agility while autoattacking.
  Fire Remnant can even be used very occasionally to get from one camp to the next quicker in order to make efficient use of the last few seconds of Flame Guard, for example, but make sure to use this technique sparingly and never do it if you feel you are farming in a dangerous area, or you only have 1 available Remnant.
 Boots of Travel are also insanely good for boosting your farm. Make sure to use them effectively to apply pressure and split-push whenever possible - even prioritize this over fights if you think you can't contribute/change the outcome of the fight. Maximize your efficiency and map presence by using your
  Fire Remnant's in conjunction with your Travels, for example by farming a lane, placing a Remnant, then teleporting to another lane to farm it/the nearest jungle, and when your Remnant is about to expire, jump back to it to return to farming/pushing in the previous lane. Try to do this for all lanes and mix it up rather than just alternating between the two. You can also have a Remnant in a place where you may need to fight/defend soon, in order to allow you to split-push/farm in stand-off/stalemate before the fight, and still be able to show up instantly for the fight once it begins. Make sure to keep track of the timer on both your Remnant and Travels!
A nice technique that you can use to farm two camps at once, if a camp has two creeps in it (e.g. Mud Golems, Hellbear Smashers), you can attack them and pull them over to another camp, pop your  Flame Guard and chain them in place with
  Searing Chains, then proceed to farm both camps at once with Flame Guard + autoattacks.
Important: Additionally, when farming Neutral camps, make sure to kill the Small Centaur/Hellbear first if there is one. They provide a magic resistance aura, and will signifincaly lower the damage of your magic damage spells, so you should take them down first, especially if clearing a stack. Later on this becomes less of a problem, once your  Sleight of Fist is enough to effectively clear camps/stacks.
In terms of pushing,  Ember Spirit is not so great at hitting towers, but he is great at killing creeps. Because of this, and because of our handy
  Fire Remnants, we can safely cut creep waves to allow our creeps to push into tower more. This way we get more farm, and push at the same time. Just make sure to watch the timer on that Remnant! Remember however that you're Fire Remnants do not grant vision (which was the case in the past), so placement of your Remnant is important. Placing it in the open or an easily accessible spot might be risky, as you may jump to it to find yourself surrounded by waiting enemies. Alternatively, try placing it nearer to somewhere that you have vision if possible, for example near a ward, an incoming allied creepwave, or an allied structure.

Example of creep-cutting.
Friends & Foes
In general,  Ember Spirit wants to avoid Heroes with a lot of disables and/or physical damage, and likes to pair up with Heroes that have AoE disables/grouping abilities, and/or can in some way increase his damage output. Listed below in each category are those Heroes which really make/break our friend Ember.
Friends

|
The  Enigma Enigma
In terms of teamfight combos,  Ember Spirit Ember Spirit +  Enigma Enigma is one that can absolutely devastate teams that are out of position. With a good  Black Hole Black Hole, you're able to get off a great  Sleight of Fist Sleight of Fist and deal a lot of damage very quickly. Over the 5 second duration you are able to get in between SoF's and right click down important enemies as well, with your cleave from  Battle Fury Battle Fury hitting all of them.
|

|
Raigor Stonehoof, the  Earthshaker Earthshaker
Good at all stages of the game,  Earthshaker Earthshaker is a good companion for  Ember Spirit Ember Spirit to help guide him through the game.  Fissure Fissure being one of the absolute best abilities in the game to gank mid with, Shaker helps Ember get some early kills in the midlane. When it comes to teamfights, often a caught out Ember or a baiting Ember may be surrounded by a fair few enemies... and what better than a Shakers instant  Blink Dagger Blink Dagger + Echoslam reaction to save the day. Can also be used to initiate fights, and when coupled with Ember's  Sleight of Fist Sleight of Fist, makes for a terrifying combo that can take out an entire team.
|

|
Gondar, the  Bounty Hunter Bounty Hunter
Being one of the most potent roamers in the game,  Bounty Hunter Bounty Hunter's ability to gank midlane effectively can really win  Ember Spirit Ember Spirit the lane.  Shadow Walk Shadow Walk lets Bounty get up close and get off a hit with  Jinada Jinada, which is not only great for pressuring the enemy midlaner, but also allows Ember to go on the aggressive and get a good  Searing Chains Searing Chains off. With both  Shuriken Toss Shuriken Toss and  Sleight of Fist Sleight of Fist being great finishers, enemies will have a hard time getting away from these two without receiving some serious damage, or even a death. On top of all of this  Track Track's bonus gold will allow Ember to get his next item that much quicker, which, for Ember, can make a huge impact on the rest of the game!
|

|
 Magnus, the Magnoceros Magnus, the Magnoceros
A special mention has to go out to  Magnus Magnus. Probably the best synergistic Hero mentioned here, Magnus makes playing  Ember Spirit Ember Spirit an absolute dream. Before getting to the juicy stuff, the two already have some decent synergy with combinations such as  Skewer Skewer into  Searing Chains Searing Chains, or  Sleight of Fist Sleight of Fist +  Searing Chains Searing Chains into  Shockwave Shockwave. But when it comes to teamfight combos, there is no better Hero than Magnus for Ember to be paired up with. Not only does Magnus's  Reverse Polarity Reverse Polarity group all enemies close together for the perfect SoF, but Magnus can even buff Ember with  Empower Empower, adding additional cleave and huge amount of damage to Ember's arsenal. An Empowered Ember with a  Battle Fury Battle Fury, will deal huge amounts of cleave damage, and since the enemies are grouped so closely together thanks to RP, the cleave is guaranteed to hit all of them... RAMPAGE!!!
|

|
 Chen, the Holy Knight Chen, the Holy Knight
The main reason  Chen Chen is getting a mention is mostly to do with his Test of Faith. It allows  Ember Spirit Ember Spirit to place down a  Fire Remnant Fire Remnant, get sent back to base and heal up, then return to lane with  Activate Fire Remnant Activate Fire Remnant, without the use of a  Town Portal Scroll Town Portal Scroll, or while his TP has cooldown. Apart from this,  Penitence Penitence can increase the damage of your  Sleight of Fist Sleight of Fist +  Searing Chains Searing Chains combo quite significantly, even with only a value point. Chen can also quickly turn a successful gank from Ember into a swift push with his creeps. It's also worth noting that  Hand of God Hand of God is amazing for saving Ember when he gets caught out, or keeping him alive for that split second longer that he needs to jump to his Remnant and escape.
|

|
Ish'kafel, the  Dark Seer Dark Seer
Combo-ing both in the laning stage and in the mid to late game with  Ember Spirit Ember Spirit, a  Dark Seer Dark Seer can be a good Hero to have on your side. In the early game, an aggressive dual offlane with Ember and Seer can be terrifying to lane against for any melee (and low ranged) cores, as  Ion Shell Ion Shell in conjunction with  Flame Guard Flame Guard makes for some insane damage per second. Coupled with this, pinning a target down with  Searing Chains Searing Chains to keep them in place while the Ion Shell and Flame Guard does work will likely net an easy kill, and Dark Seer's  Surge Surge is the perfect tool to help Ember get off that chains, to net the kill! Furthermore, into the mid and lategame,  Vacuum Vacuum can be used to group enemies together in a huge AoE, allowing Ember to get off a perfect and devastating  Sleight of Fist Sleight of Fist. Definitely one of the best Hero combos on this list, only second to  Magnus Magnus, these two Heroes can make any melee carries safelane into a true nightmare! All these pointers also carry outside of laning too, with Ion + Flame guard and Vacuum + Sleight being terrifyingly strong combos at all points in the game.
|
Foes

|
Raijin Thunderkeg , the  Storm Spirit Storm Spirit
This Hero is often picked as a counter to  Ember Spirit Ember Spirit, and it's pretty easy to see why.  Storm Spirit Storm Spirit is a very strong laner and can often outlane an Ember, and into the later stages of the game once he picks up  Orchid Malevolence Orchid Malevolence and/or  Scythe of Vyse Scythe of Vyse, nothing will save you from a Storm zipping across the map with  Ball Lightning Ball Lightning and disabling you. However, it's not as one sided as it may seem. In lane, make sure to not get hit by his  Static Remnant Static Remnants, and max your  Flame Guard Flame Guard as soon as possible. At Level 5, with (and sometimes without) a gank, you should be able to kill him, and even at Level 6, you can dive after him with  Fire Remnant Fire Remnant. It's important to shut him down when you can, and you can even consider going an Orchid build yourself in order to shut him down further (Orchid Ember explained in further detail in Itemization).
|

|
Tresdin, the  Legion Commander Legion Commander
High armour, a good self-purge, high physical damage, and arguably one of the best single-target lockdown abilities in the game,  Duel Duel,  Legion Commander Legion Commander is one of  Ember Spirit Ember Spirit's worst enemies. She's incredibly hard for Ember to kill, and incredibly good at killing/disabling Ember. The best way to deal with this is to make sure you establish dominance early and crush the enemy team - because if this LC gets ahead and starts picking you off, things aren't going to go well. Once LC gets a  Blink Dagger Blink Dagger, picking up a  Linken's Sphere Linken's Sphere on Ember is close to 100% necessary, and helps you abuse the fact that LC has no way no break the Linken's other than Duel. Make sure to have a  Fire Remnant Fire Remnant ready to escape with at all times, and try and avoid getting caught out by her in fights (stay back, position yourself behind your team with plenty of room to  Searing Chains Searing Chains and back off). Additionally, now that her  Aghanim's Scepter Aghanim's Scepter has been reworked in 6.86, it's especially terrifying to a Hero like Ember, and could result in your team getting wiped without your aid, or you getting picked off without a chance to escape.
|

|
Atropos, the  Bane Elemental Bane Elemental
Another great single-target disabler, to  Ember Spirit Ember Spirit,  Bane Bane is the stuff of nightmares... literally.  Nightmare Nightmare will set up for an easy chain stun, and  Enfeeble Enfeeble can turn Ember's once strong  Sleight of Fist Sleight of Fist into a mild tap.  Brain Sap Brain Sap's pure damage will go straight through your  Flame Guard Flame Guard too, and that hurts - a lot. Worst of all, Bane's Ultimate,  Fiend's Grip Fiend's Grip will basically pick Ember apart piece by piece. Dealing pure damage that goes straight through his shield, disabling Ember for a long period of time, and even draining all his mana so that even if he does somehow survive, he'll have no mana left to use  Activate Fire Remnant Activate Fire Remnant to escape. You do not want to get caught out by this Hero, and you absolutely need a  Linken's Sphere Linken's Sphere. Bane can break the Linken's without any of his spells apart from his Ultimate, so be careful it wont protect you entirely - but it does allow you time to react and either escape to your  Fire Remnant Fire Remnant or blink away with your  Blink Dagger Blink Dagger(if you have one).
|

|
Mortred, the  Phantom Assassin Phantom Assassin
When playing  Ember Spirit Ember Spirit, having to go up against a  Phantom Assassin Phantom Assassin is pretty nasty. Her  Stifling Dagger Stifling Dagger slows you, meaning if you didn't already have a  Fire Remnant Fire Remnant, throwing one out now wont be very effective as it'll be slowed too, and it deals pure damage, so it ignores your  Flame Guard Flame Guard. In addition to this, as of patch 6.85, her dagger now applies her on-hit affects upon contact - meaning if she has a  Skull Basher Skull Basher, she can bash you with her dagger. She can chase you quite well with  Phantom Strike Phantom Strike, you can't hit the damn Hero due to  Blur Blur, and the physical damage critical hits from her Ultimate,  Coup de Grace Coup de Grace, will melt you like a hot knife through butter. It's important to shut her down early game before she gets strong, and when she goes on you, kite her as much as possible with  Searing Chains Searing Chains. Once she gets  Black King Bar Black King Bar, you simply need to stay the hell away from her, and make sure you can damage her either from afar with  Sleight of Fist Sleight of Fist, or while she is disabled. You really need a  Monkey King Bar Monkey King Bar against this Hero, because even though the cleave from your  Battle Fury Battle Fury will still hit her, you need to be able to hit her with your SoF and autoattacks whenever possible - especially in the lategame when Ember can do upwards of 900 damage in one hit, missing your attacks simply aren't an option!
|

|
Nerif, the  Oracle Oracle
While this Hero is rarely picked, in the rare case that it is picked, you may want to avoid picking up  Ember Spirit Ember Spirit. Although playing against  Oracle Oracle isn't the worst that could happen, he'll certainly have a good go at ruining all your fun. First off, with a strong purge has his first skill, Oracle's  Fortune's End Fortune's End can purge off your  Flame Guard Flame Guard in an instant. Try and wait till the purge hits you before you cast Flame Guard if possible - but if he's using it specifically to remove your Flame Guard, well there's nothing you can really do. Fate's Edit is a spell that can be used to ruin your day even more in both the early and the late game - as in the early game, a lot of Ember's damage comes from Flame Guard and  Searing Chains Searing Chains, and  Fate's Edict Fate's Edict will render their damage irrelevant. To try and combat this, focus on a skillbuild more based around Chains and  Sleight of Fist Sleight of Fist, so that you can instead use physical damage as your main output earlier on. In the late game, Fate's Edict can be cast on you, which will disarm you, meaning your Sleight of Fist's wont do any damage for the duration of the disarm.  False Promise False Promise also makes diving towers for a kill a whole lot trickier as Ember - but just make sure you output more damage than he can heal for, and back off.
|

|
Clinkz, the Bone Fletcher
Now this is a scary Hero to play against as  Ember Spirit Ember Spirit. With innately high physical damage due to being an agility carry in conjunction with  Searing Arrows Searing Arrows and  Death Pact Death Pact,  Clinkz Clinkz will hunt you down and kill you. With  Skeleton Walk Skeleton Walk giving him easy initiation and escape from Ember (with  Searing Chains Searing Chains and  Sleight of Fist Sleight of Fist not targeting invisible units), and  Strafe Strafe, Clinkz can deal a ridiculous amount of physical damage in a very short period of time. Clinkz players love to play against squishy, low armour Heroes, and for most of the game that's what Ember is - a squishy, low armour Hero. With many Clinkz players opting to pick up an  Orchid Malevolence Orchid Malevolence you wont be able to use  Activate Fire Remnant Activate Fire Remnant to escape to safety. If you're not able to establish an early lead, you're going to need a defensive item. If ahead or on even terms, picking up a  Solar Crest Solar Crest for the evasion and armour will really help against Clinkz's physical dps. If on slightly worse terms, or far behind, a  Ghost Scepter Ghost Scepter is probably necessary to unsure you survive until the end of Orchid duration, so that you can Remnant out. Don't leave it too late to pick one of these items up, as skipping out on them to get an earlier  Battle Fury Battle Fury may result in you getting caught out and dying.
|
External Resources
For those looking for some more resources to check out if you're interested in learning more about  Ember Spirit, check out some of the videos below! You can also check out my own YouTube Channel, but there's not much content there as of yet.
These videos were all made by a YouTuber called Bren Dota, a 6k+ player who does gameplay commentaries and analyses of various Heroes. He's very easy to follow and a great guy, so I'd highly recommend you check out his channel and some of his other videos as well as the Ember one's I've linked here! (Note that these Ember games were played during patch 6.85)
Tip: Click the title to go to the respective YouTube page of each video, if you'd prefer to watch it there!
Videos:
My Recommendations
As someone who plays  Ember Spirit a lot, I thought it'd be good if I gave some recommendations on what I think helps players to learn/improve on Ember. The things listed below are not a must, but you should at least try them out before disregarding them!
Quickcast!
Quickcast is something  Ember Spirit can use very well. While it is down to personal preference, I'd recommend using Quickcast for your
  Sleight of Fist and
  Activate Fire Remnant. For SoF, having it on Quickcast makes the combo with
  Searing Chains much smoother and allows us to use it quicker in dire situations, but you do need to learn the AoE first. For Remnant, being able to jump to your Remnant at the press of 1 key is can be helpful so that it takes as little time as possible, and if stunned, you'll likely be spamming this key. However personally, I am more comfortable with it on Normal cast. Keep in mind - when you're first learning the AoE of SoF, you should keep it on normal cast so that you can see the AoE and get the max distance! Once you learnt this and are comfortable with it, you can try putting it onto Quickcast. In the settings menu, it looks like so;

Normal cast is used for the rest of the spells (of course,  Flame Guard and
  Searing Chains are instant cast so they are unaffected by Quickcast). I prefer to use Normal cast on
  Fire Remnant, because it's very easy to mess up where you throw it out when using Quickcast. However, if you get comfortable with using both Fire Remnant and
  Activate Fire Remnant on Quickcast, then in theory you should have an advantage - so it's worth trying out to see if you find it beneficial.

Whether you use Quickcast or not and what spells you use it on is completely up to you, but I would certainly recommend it. You can also try out Quickcast on items - for example  Blink Dagger and
  Abyssal Blade become a lot easier to use in conjunction with your skills when you have Quickcast on. Remember, it's all up to personal preference in the end, and whatever you're most comfortable with is what's best for you! But you should definitely make sure you give it a shot.
Practicing Combos!
This is really important. The most important of this is your  Sleight of Fist +
  Searing Chains combo - you need to make sure you've got it down before entering a game to play some serious
  Ember Spirit. Load up a test lobby (or demo hero), and practice chaining enemies while SoF-ing. Also make sure to practice on enemies in the Fog of War too, as the interaction is a little different (you have a 0.1 second window in which chains will connect instead of point 0.2. See below*)! As Ember, you need to be consistently hitting your SoF + Chains - trust me, it'll help a lot.
*(To briefly explain the fog interaction with SoF + Chains, there is a brief delay before you actually gain vision over the target you're Sleighting. This delay is roughly 0.1 seconds. Because Chains does not hit enemies that you do not have vision on, it means you need to wait ~0.1 seconds before casting Chains, leaving you the remainder ~0.1 seconds in which Chains is able to connect. The time window in which you are Sleighting does not change, only the time window in which Chain's can connect.)
Playing vs Counters!
If you're really serious about learning the Hero and want to get to know all his Hero match ups and how you find it easiest to play around them - well, you're going to want to basically first pick  Ember Spirit every game. With this, some games you will be countered, and some you wont - so you'll be able to learn how to play in a game without counters and also in one with counters. I'd advise doing this in unranked!!. It'll save your precious MMR and people will be less pissed off at you if you mess up a little.
Awake, Alert, and Positive!
Your mental health and physical health are always important when playing any Hero in this game. But especially for a Hero like  Ember Spirit, who can be quite taxing in these aspects, make sure you are awake and alert so you can perform to the best of your ability.
Also, remain positive! Tilting is never fun, and after a game where you've tilted you'll be left with a bad taste in your mouth. Remain positive, you'll be fine - don't forget, you've already got a built in  Flame Guard! Get it? Heh.
Have Fun.
As always, the most important thing is to have fun. If after trying out the Hero you really just don't click with it - or if it's causing you more stress than it is fun; try something else. There's no point forcing yourself into doing something you're not enjoying! And vice versa, if you are enjoying the Hero and want to play him more and more, go ahead, and enjoy the game! Remember - at the end of the day, you're the one that decides if you're having fun or not.

About Me/Contact Details
First off - I'm by no means a professional Dota 2 player, and I do not claim to be. I'm currently sitting around 4.5k MMR, so the most appropriate target demographic of this guide would likely be anyone between 1 MMR - 5k MMR. As for my experience with  Ember Spirit, I have around ~200 games with around ~70% winrate at the time this picture was last updated. Keep in mind I play Ember quite frequently so this number may be significantly higher if the image was not updated recently.
I've been playing Dota 2 for almost 3 years now, and Ember has been one of my favorite Heroes since release. I hope you guys are able to take at least something out of this guide/enjoyed it a little! I know it's a little bit wall-of-text-ish, but I just had so much to say - I'll try and work on getting to the point more in future guides I may/may not make! Please note I'm not saying I
will be making more guides, I'm just saying I
might. For now, I'll be constantly updating/expanding upon this one. I'm also frequently active on Ember Threads/questions on
/r/LearnDota2!
Any and all constructive criticism is welcomed, along with advice or maybe something you think I am wrong about! Post them down in the comments below.
If anyone has any questions about anything you feel I didn't cover, I'll be happy to answer or maybe add them to the guide!
Vote here for which Hero you'd prefer to see in potential future guides!
If you'd like to get in contact with me;
Changelog

Spoiler: Click to view
*All date's follow the European system of dd/mm/yy
____________________________________________________________________________________
23/09/15
* Corrected several spelling/grammatical errors
+ Added changelog
____________________________________________________________________________________
24/09/15
* Corrected several spelling/grammatical errors
+ Added "Understanding Remnant Speed" section in Abilities & Skillbuild chapter
+ Added  Dark Seer to "Friends" in Friends & Foes chapter
+ Added  Oracle and
  Clinkz to "Foes" in Friends & Foes chapter
____________________________________________________________________________________
25/09/15
* Various values and spell effects updated to 6.85 versions
+ Expanded upon  Phase Boots in response to 6.85 changes in Itemization chapter
____________________________________________________________________________________
29/09/15
* Guide updated to 6.85!
+ Added '6.85' to guide title
+ Added  Shadow Blade to all 3 respective visual item builds in "Situational" group
+ Added  Shadow Blade to "Situational Items" in Itemization chapter
____________________________________________________________________________________
04/10/2015
* Routine proofread and grammatical fixes
* Updated "Drums or Aquila?" section information in the Itemization chapter
* Updated "Quickcast!" section in the My Recommendations chapter
+ Added Strawpoll vote for next Hero guide in About Me/Contact Details chapter
____________________________________________________________________________________
08/10/2015
* Various minor corrections and edits
* Updated the hyperlinked Steam item build with minor additions
+ Added additional information to  Fire Remnant's description
____________________________________________________________________________________
12/10/2015
* Changelog compacted and put into a spoiler for easy accessibility/readability and better presentation
* Introduction reformatted for better presentation/readability
* About Me/Contact Details chapter reworded regarding future guides, link to Strawpoll vote also reworded
* Reworded  Phase Boots description in Itemization chapter
+ Added additional information to  Power Treads in Itemization chapter
- Small sentence giving notification/anchor of Changelog removed from top of the guide
____________________________________________________________________________________
20/10/2015
* Introduction updated/reworded
*  Desolator's description updated/reworded in Itemization chapter
*  Dark Seer's description updated/reworded in Friends & Foes chapter
+ Previously removed sentence giving notification/anchor of Changelog re-added/moved into the Introductory paragraph
____________________________________________________________________________________
22/10/2015
* Updated About Me/Contact Details chapter's text
* Made various small layout improvements/adjustments
+ Added screenshot of Games/Winrate into About Me/Contact Details chapter for presentational purposes
- Removed  Poof from list of skills that are disabled by
  Searing Chains in it's skill description
____________________________________________________________________________________
11/11/2015
* Fixed/Updated the math in "Understanding Remnant Speed" section in Abilities & Skillbuild chapter
* Updated  Battle Fury's description in Itemization chapter
* Updated the Steam counterpart item build with a better description
+ Added more information about  Boots of Travel to Farming/Splitpushing chapter
+ Added  Butterfly to all 3 respective visual item builds in "Situational" group
+ Added  Butterfly to "Situational Items" section in Itemization chapter
+ Added ideal mapsides (Radiant/Dire) to each lane description in Laning chapter
____________________________________________________________________________________
18/11/2015
* Changed opening text to "Situational Items" section in Itemization chapter
* Updated Drafting Phase chapter's introductory paragraph with a slight disclaimer
+ Added link to "EternaLEnVy's Stream" mentioned in  Solar Crest's item description, leading to his Twitch channel
+ Added randomized quote to "Information about Ember" section in the Introduction chapter
+ Added new chapter, External Resources featuring videos about  Ember Spirit
____________________________________________________________________________________
02/12/2015
* Updated several images throughout the guide
* Slightly reworded some paragraphs in the My Recommendations chapter
* Fixed randomized quote that changes every few hours
+ Added more possible quotes to randomized quote function
____________________________________________________________________________________
16/12/2015
* Guide updated to 6.86!
* A few various broken links fixed
* Routine proof-reading and grammatical/informational errors corrected
+ Added '6.86' to guide title
____________________________________________________________________________________
01/01/2016
* Clarified Fog of War interaction in My Recommendations chapter
+ Added additional information to  Phase Boots in Itemization chapter
____________________________________________________________________________________
11/01/2016
* Updated personal  Ember Spirit stats display in About Me/Contact Details chapter
* Adjusted Safelane and Offlane visual item builds slightly
+ Added mention of  Faerie Fire to "Midlane" in the Laning chapter
____________________________________________________________________________________
04/02/2016
* Updated title to most current version
* Updated/Rewrote  Satanic section in Itemization chapter
+ Added  Ghost Scepter to "Situational Items" in the Itemization chapter
+ Added  Ghost Scepter to all 3 respective visual item builds in "Situational" group
- Removed  Solar Crest from "Situational Items" in the Itemization chapter
- Removed  Solar Crest from all 3 respective visual item builds in "Situational" group
____________________________________________________________________________________
11/02/2016
+ Added link to YouTube Channel in External Resources chapter
+ Added link to YouTube Channel in About Me/Contact Details chapter
____________________________________________________________________________________
17/03/2016
* Updated picture showcasing personal  Ember Spirit statistics in About Me/Contact Details chapter
+ Added various links to external content throughout the guide
____________________________________________________________________________________
22/04/2016
* Various aesthetic/informational touch-up's and improvements
* Updated images in My Recommendations chapter for better aesthetics/visualization
* Updated picture showcasing personal  Ember Spirit statistics in About Me/Contact Details chapter
+ Added new chapter! Utilizing Runes, featuring information on interactions and utilization of Runes for  Ember Spirit
____________________________________________________________________________________
15/05/2016
* Rearranged some of the item orders in the visual item-build guide-lines
+ Added some additional snippets of information to various sections based on the recent 6.87 update
____________________________________________________________________________________
09/07/2016
* Minor updates for most recent patch, 6.88
* Fixed various broken links
[/spoiler]
 Poor Man's Shield


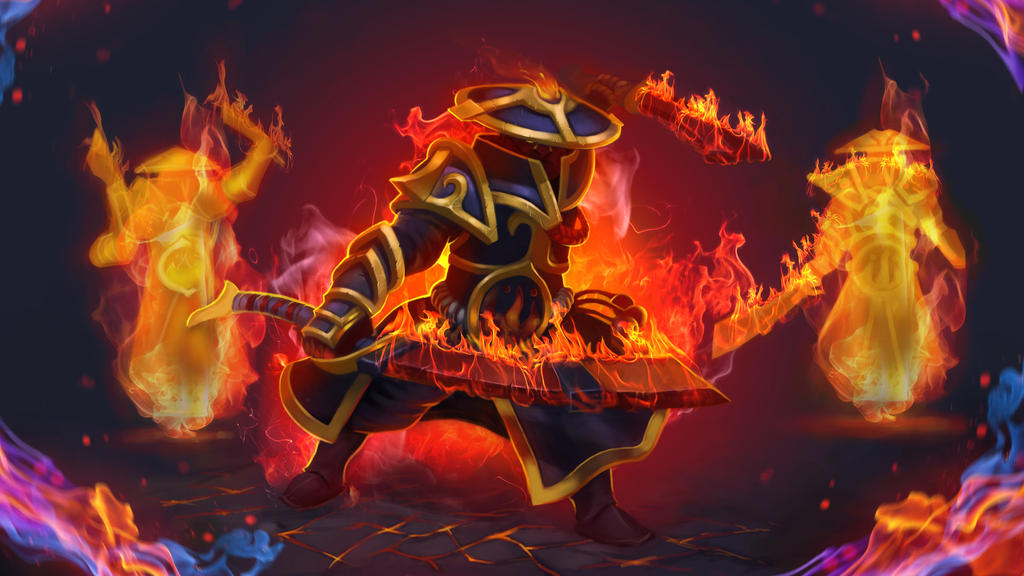


 Spoiler: Click to view


 -
-  -
-  -
-  -
-  -
-  -
-  -
- 


Quick Comment (55) View Comments
You need to log in before commenting.