Peppo_o'Paccio's guide to the Rogue Knight
Peppo_oPaccio
December 14, 2014
Pros and Cons
Since there are three builds, I'll actually list the pros and cons of all of them that will cover both  Sven's capabilities and the usefulness of the builds themselves:
Carry Build
Hard Carry Build
Support Build
When to Pick Him
Carry Sven isn't one of those situational carries, but as he still needs a bit of time to farm his core you have to let him play an easy laning phase. He's good at all stages of the game, though he shines when your items are more than the enemy carry's (mid-late game) and, as his HP is pretty high, you'll never have the "squishy lineup" issue.
Summarizing, play hard carry Sven if:
- Your team lacks stuns;
- You have less than 3 melee Heroes already;
- You have enough space for your carry to farm for ~20 minutes;
- You can (most of the time) slow/disable your targets so Sven doesn't get kited;
- You want to combine AoE ultimates (
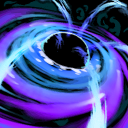 Black Hole,
  Reverse Polarity...) with cleave damage.
Also, don't play hard carry
Sven if:
- Your team is mid-game oriented;
- You'll be playing versus a strong lane;
- You can't manage your mana efficiently (very important!);
- You forget to activate your abilities and items in teamfights.
About the mid-game oriented skill build: it's much more viable in other situations, especially if you have a harder carry in your team. Playing mid
Sven is possible, especially because your ganks past level 6 will be extremely powerful and a
 Bottle
 covers your needs mana-wise. Being able to carry auras is also pretty good, especially in a pushing-oriented team; you can also grab a
 Blink Dagger
 and become a strong (though unreliable) initiator and chaser.
Summarizing, play semi-carry
Sven if:
- There's a harder carry in your team;
- You have less than 3 melees already;
- You team needs an initiator or a semi-carry;
- You can adapt your item build according to the situation;
- You want to be useful in the mid game by ganking and carrying auras;
- You want to combine AoE ultimates ( Black Hole, Reverse Polarity...) with cleave damage.
Also, don't play semi-carry
Sven if:
- You forget to join fights and keep farming in the jungle;
- You forget to activate your abilities and items in teamfights;
- You have a very safe lane and can afford more expensive items;
- You are the only farm-dependent Hero in your team and you want to go into late game.
Support
Sven, on the other side, is viable in
any situation unless you already have a melee support or you're playing dual lanes with a melee carry.
Summarizing, play support
Sven if:
- Your team lacks stuns;
- Your team needs a hard support;
- You already have a
 Mekansm carrier in your team;
- You want to smoke gank with another support in a trilane;
- You need a setup stun for unreliable stuns (
 Split Earth,
 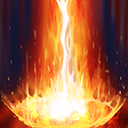 Light Strike Array...).
Also, don't play support
Sven if:
- Your team needs a Mekansm carrier;
- You'll be playing dual lanes with a melee carry;
- You already have a melee support in your team;
- You can't manage your mana efficiently (very important!).
Abilities
 |
|
Even if its level 1 damage is poor (100), his stun duration is 2 at all levels: getting early kills, even at level 1, should be pretty easy with good follow-up damage.
At level 4 it deals a whopping amount of damage: a 2 second AoE stun with 325 damage makes Sven a good support Hero and initiator, too.
Use the stun before engaging a teamfight, then activate your skills ( God's Strength, God's Strength,  Warcry) and items ( Warcry) and items ( Drum of Endurance, Drum of Endurance,  Armlet of Mordiggian, Armlet of Mordiggian,  Black King Bar, Black King Bar,  Mask of Madness...) and get within melee range to land some easy hits. Mask of Madness...) and get within melee range to land some easy hits.
Don't be afraid to "waste" it if all the enemies are clumped up in one spot: being able to deal such AoE damage to 2-3 Heroes is pretty efficient for its mana cost at level 4.
Its cooldown time makes you able to use it even twice in the same fight: throw your  Storm Hammer at the beginning of a fight, then use it to chase fleeing enemies. Storm Hammer at the beginning of a fight, then use it to chase fleeing enemies.
|
 |
|
This ultimate is very particular and can be used for two purposes, depending on your role:
- As a carry, to improve esponentially your damage in teamfights;
- As a support, to have late game presence and be stronger in ganks.
As it has an 80 second cooldown, you can easily use it to ensure a kill on a Hero you're ganking (as said above) and, probably, still have it up for the next teamfight.
The mana cost is pretty high for such a Hero, especially if you want to cast your other abilities first: always double check your mana before throwing a Warcry that leaves you with 190 mana in a decisive fight.
Remember that the extra damage depends on your STR points, not on your damage points: only the extra strength from stat-based items ( Heart of Tarrasque, Heart of Tarrasque,  Linken's Sphere, Linken's Sphere,  Satanic) gets multiplied. Satanic) gets multiplied.
|
Items Explanation: Carry Build
This is a mid-game oriented build: Sven has many built-in damage steroids and can get away with buying a Blink Dagger in the mid game without sacrificing damage. A Blink-stun initiation ensures you can start a fight before getting initiated on or chainstunned to death and grants easy kills on lone Heroes. In the late game, if you played it well, if the enemy has one of those hard carries like  Spectre or
  Phantom Assassin you should have been able to shut them down, while if they have a more mid-game oriented carry like
  Slark or
  Juggernaut your net worth should be higher than theirs.
Starting items
Dual/Trilane
Bottle Rush
Core items

|

|

|
|
If you're mid, always rush a Bottle! Getting rune control is pretty easy with Sven, given his long-duration stun and movement speed buff; runes also give you a huge advantage when ganking other lanes and the Bottle itself solves your early mana problems.
What Boots should you get? I almost always go for Power Treads, because extra attack speed makes you able to hit more frequently after stunning and Tread switching also helps when you have a Bottle. The only time I go for Arcane Boots is when I'm playing an aggressive trilane and my teammates need to spam their spells or when I'm in the safe lane and none of my teammates are building them.
A Magic Wand solves your early mana issues and removes those Iron Branches obstructing your inventory. If you're laning versus Heroes that tend to spam their spells, buy a  Magic Stick right after Magic Stick right after  Boots of Speed (or even before if you're getting pressured a lot). Boots of Speed (or even before if you're getting pressured a lot).
Now, build your Blink Dagger. I absolutely love this item, every carry with a stun should make one: much like a  Wraith King, you can keep afk farming for 10-15 minutes and then, as soon as you get your Dagger, five man with your team and push towers. This item is so good because, unlike WK, Sven's stun hits in an AoE, so you can potentially disable the whole enemy team! Wraith King, you can keep afk farming for 10-15 minutes and then, as soon as you get your Dagger, five man with your team and push towers. This item is so good because, unlike WK, Sven's stun hits in an AoE, so you can potentially disable the whole enemy team!
Last but not least, don't forget your Black King Bar: you'll need to get one 99% of the time, and if you're playing in that 1% you probably shouldn't have picked Sven anyway. Sven's power comes from his stun-ultimate combo and, since his early game damage comes from God's Strength, you don't really need to build damage items before the mid game. Moreover, BKB not only protects you but also gives you a good amount of damage.
|
Items Explanation: Hard Carry Build
As said in the introduction, the main problem of all hard carries is that this meta is mid-game oriented and doesn't have enough room for the most farm-depentent Heroes to farm their core: that's why you get an early  Helm of the Dominator, so that you can easily get a tri or quad stack and farm it to get a big chunk of your Black King Bar (or your next core item). The core build is a mixture of the most cost-efficient items ( Armlet of Mordiggian for example) and some staples that should never miss on a carry in a serious match like the Black King Bar.
Starting items
Choice 1
Choice 2
Early game items
|
|
|
As usual, get your Boots of Speed as soon as possible to have better killing/escaping potential.
You should take a Magic Stick as your second item because burst healing is the best way to counter aggressive lanes: if you feel like you lack regen and your health is always low, this is the cheapest option that solves your problem.
Power Treads are definitely your boots of choice here: you might ask why I don't suggest Phase Boots since kiting is a big problem for Sven, and well, the answer is simple: your first skill does a 2 second stun, which is enough for your teammates to follow up with teamfight ultimates or single target disables.
Lastly, build a Helm of the Dominator starting from the  Helm of Iron Will: your objective here is getting early survivability (and even, though in a very small percentage, sustainability thanks to the lifesteal) and the ability to get an early lead in gold, everything without assembling a huge item you probably won't need after the mid game (like the Vanguard). Helm of Iron Will: your objective here is getting early survivability (and even, though in a very small percentage, sustainability thanks to the lifesteal) and the ability to get an early lead in gold, everything without assembling a huge item you probably won't need after the mid game (like the Vanguard).
Remember to dominate a jungle creep and use it to stack ancients! If you don't know how to do it, you can just hit them with your dominated creep at X:53 and run away, so when they come back another group of creeps gets spawned, too. Read here for further information.
Then, get a Magic Wand if you still have some spare Branches or you're facing a lane that tends to spam a lot.
|
Core Items
Late Game Items

|
|
Vlad's is the other choice for when you want to build your  Morbid Mask into something: it's not needed, but if you feel that extra 1100 gold delay won't make that much of a difference, get this over damage items. It's also good for when you want to kill Roshan, since not only the lifesteal but also the damage increase applies when fighting him. Morbid Mask into something: it's not needed, but if you feel that extra 1100 gold delay won't make that much of a difference, get this over damage items. It's also good for when you want to kill Roshan, since not only the lifesteal but also the damage increase applies when fighting him.
This item is good at all stages of the game, its cheap aura scales well into late game. It's even more appealing if you have one or two more melees in your team, as the lifesteal only applies to them (and you).
|
Items Explanation: Support
First things first: what does "position #4 support" mean? In a normal team you have two supports, one called the "hard support" (also known as he "position #5 support") who buys most of the  Observer Wards and is left with very little gold throughout the game, and one called the "semi-support" (i.e. the "position #4 support") who benefits from extra gold and can be a Hero with carry potential like
  Silencer,
  Mirana and
  Tusk. The number means the farm priority of the Hero, so the team's carry will be the position #1, the mid laner the position #2 etc. This means that Sven should be played much like a snowballing Hero instead of a passive support, since given enough money he can actually outcarry the enemy Heroes.
I personally like playing support Sven, I think he has a lot of hidden potential: his first two abilities are definitely support-oriented (or, still, good for both carries and supports), and his third one ensures he can transition into a decent damage dealer in the late game. Don't forget he's one of the very few supports that can grant extra survivability (and even movement speed!) to his team, and for this reason I consider him a very solid pick. God's Strength even gives him extra damage for teamfights and makes smoke ganks (even without the full team) a piece of cake. He's also one of the best roaming supports, as not everyone has a 2 second high-damage stun and a movement speed buff.
Starting items
Courier + Observers
Smoke + Sentries
Early game items
Mid game options

|
|
This is my secondary choice: if one of my teammates already has an Urn, I tend to pick it (or, rarely, just skip it). Actively using the Valor on a target enemy makes them much more squishy, and the extra mana regen is always welcome.
It's also very useful for fighting Roshan, since the armor reduction applies to him and makes him so much easier to kill. If my team's strategy includes actively fighting Roshan, I make sure I get a Medallion of Courage as soon as possible.
|
Late game items

|
|
This is already a pretty good item for AGI or INT-based supports, but it's even more effective on strength Heroes: extra survivabilty and evasion make you much harder to deal with, but the extra HP also translates into extra damage.
Again, I suggest taking this if you aren't doing that well because it's made from relatively cheap components (except for the  Talisman of Evasion) and helps your team a lot in the right circumstances. Talisman of Evasion) and helps your team a lot in the right circumstances.
Although the Maim won't be that useful, the Disarm is what you're looking for: use it on the enemy carry after he activates his BKB, if he has one. He will probably wait for your Disarm and then pop it, but if you let him use it before and your team survives the first part of the teamfight you can render him useless.
|
|
|
|
Vlad's is overall one of the best support picks: a cheap late-game aura that, as it's percentage-based, always scales well. If there are at least 1 or 2 more melee Heroes in your team, you should definitely take it.
As for the Medallion, it's also very good for fighting Roshan: the extra damage increase makes you able to kill him quickly, while the lifesteal prevents you from getting low on health after he dies.
|
Skill Builds
When playing carry I think the best skill build is only one, and it's basically copypasted from  Luna: you obviously have to max out your Storm Hammer first, but since you won't need the
  Great Cleave before the laning phase ends (on the contrary, it pushes the wave which is a terrible mistake) you get two points in Warcry and leave it last. You will need full levels on your Cleave by level 12 because by that time you should be killing ancients and jungle creeps to get extra gold, not to mention it's also very strong in early teamfights. As always, max God's Strength as soon as possbile since there's no reason to skip it besides the (negligible) mana cost.
If you are supporting, on the contrary, you won't need the
Great Cleave to farm so you can focus on maxing out your
Storm Hammer and then your
Warcry, since extra armor is so valuable on supports and it also gets transferred to teammates. I usually take a stat point at 4 to get extra mana, but you can max
Warcry by level 9 if you want; I just think that what you really need in the early game is the extra movement speed, so the cooldown reduction and extra armor don't have that much of an impact before the big teamfights of the mid game.
Friends and Foes
Friends
Sven is both a big teamfight contributor and a very good setup for chainstuns; whether you're carrying or supporting you should lane with Heroes whose spells deal a lot of damage but are difficult to land. The fist line is for supports, the second line is for carries and semi-carries:
In teamfights, your best friends are those initiators that grant you free hits for a couple seconds. Some of them are:
Teammates with damage buffs are also pretty helpful:
Foes
Sven's foes are those that can kite him, especially if they have a slow that goes through BKB:
BKB-piercing single target spells are also pretty scary for him, since he relies on his
Black King Bar most of the time:
Update History
11-23-2014: Done some cleanup, again.
6-15-2014: Done some cleanup and edited the semi-carry build.
2-6-2014: Written the first part of the guide.


Quick Comment (30) View Comments
You need to log in before commenting.