Help Support Our Growing Community

DOTAFire is a community that lives to help every Dota 2 player take their game to the next level by having open access to all our tools and resources. Please consider supporting us by whitelisting us in your ad blocker!

Want to support DOTAFire with an ad-free experience? You can support us ad-free for less than $1 a month!

Go Ad-Free
Smitefire logo

Join the leading DOTA 2 community.
Create and share Hero Guides and Builds.

Create an MFN Account


Or

11 Votes

Sando's Guide to Weaver

November 17, 2014 by Sando
Comments: 17    |    Views: 44923    |   


Standard

DotA2 Hero: Weaver


Hero Skills

Rewoven (Innate)

The Swarm

8 12 13 14

Shukuchi

1 3 5 7

Geminate Attack

2 4 9 10

Time Lapse

6 11 16

Talents

15

Introduction


Weaver is one of the fastest and most evasive heroes in the game, balancing poor stats with incredible abilities. He has two incredible escapes, and can be one of the hardest opponents to pick off. On top of this, he is a strong and flexible carry.

However, he is very skill and reflex reliant, and can be easy meat for enemies with the right skillset or items...read on for a guide on how to build and play him effectively...

Strengths and Weaknesses

+ Extremely Evasive
+ Great chaser and escape
+ Can effectively double his health and mana pool
+ Can dodge or debuff many abilities
+ Slows are ineffective against him
+ Good damage output
+ Effective pusher
+ Flexible laner

- Extremely squishy
- Very vulnerable to burst, stuns and silence
- Can lack teamfight presence
- Poor stat gain
- Item dependent
- Requires skill and fast reflexes

The Swarm


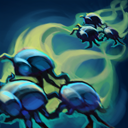
The Swarm is a useful pushing and damage utility ability, calling forth a swarm of bugs that will latch themselves to enemies in their path. Each enemy hit will take continued damage and armour reduction for every second the parasite is attached to them, and creeps will stop to attack them before moving on to other targets.

Theoretically, each bug can do up to 450 damage and reduce armour by up to 15, but it's unlikely that targets will wait that long to remove them. Each bug also grants a bounty to enemy heroes, meaning you have to be careful not to feed with them.

While useful, The Swarm uses quite a lot of your limited mana pool at the start of the game, meaning that you generally want to wait longer before skilling it. However, it can be worth an early point in them if you're looking to push.

The bugs provide a small amount of vision around them, making them useful for scouting, although you need to be aware of the long cooldown time before you can call them in again.

Generally you want to use them for pushing, counter-pushing, and team fights. While the damage is relatively small, the armour reduction is very useful for a hero who is so dependent on physical damage, and it can also helps heroes on your team who deal lots of physical damage.

Shukuchi


Shukuchi is the skill that primarily drives Weaver's playstyle. It provides a short burst of invisibility and maximum movement speed, as well as applying damage to any enemy unit you touch (1 instance per use max).

You almost always want to max Shukuchi first, although this is primarily for the cooldown reduction rather than the increase in damage. Having it available when you need it is vitally important for a hero as squishy as Weaver.

Shukuchi gives you fantastic evasion and chasing skills. You can dodge a large number of spells and incoming projectiles by using Shuki, and the maximum movement speed override also makes slows generally ineffective against you.

Fast reflexes are an important part of getting the most from Shuki - you need to have your finger constantly ready to hit it as soon as anything threatening is about to happen. With fast reaction speeds you can be incredibly difficult to play against, and it can make the difference between death and survival.

However, it's important to remember that Shuki doesn't make you invulnerable - enemies with detection can still target you effectively, and you can be in big trouble if you're on the receiving end of a long silence or stun.

Another thing to be careful of is which enemies to use the shuki damage against - heroes like Axe and Necrophos can still target you with some of their abilities when they see the blur effect of you moving through enemies nearby.

Once you have sufficient mana, you can shuki almost as much as you want, using the extra damage for pushing and farming. Also be aware that you can Shuki after using a Town Portal Scroll, and won't cancel it as long as you don't do anything else.

Geminate Attack


Geminate Attack is Weaver's main DPS steroid - automatically triggering a second attack whenever it is off cooldown.
This attack is made as soon as your primary attack hits, and can still fire off even when the target would normally be out of your range.

It's quite unusual in that it cannot be boosted further by attack speed (like most DPS passives), but works purely on raw damage/crits or UAM procs to boost your effectiveness. This tends to inform the way we build Weaver - while agility and attack speed still improve your overall damage output, other items tend to boost Geminate Attack far more.

Weaver tends to lack raw stats, and while his agi gain of 2.5 is respectable, you need to be aware that Geminate Attack makes your damage somewhat bursty - you can often use this to your advantage - for example, if chasing an opponent, using Shukuchi to damage them, then come out of it just as Geminate Attack is off cooldown - allowing you to hit them with two projectiles even if they're at the edge of your range.

Time Lapse


Time Lapse is the final part of your survival kit - an extremely powerful ultimate that can let you effectively double your health pool with clever usage, as well as removing unpleasant effects and allowing you to manipulate your position.

It's another skill that requires good reflexes and precision usage
- it can often be the difference between a horrible death and a full health rampage. Remember that you can queue it using Shift if you're stunned, making sure you use it as soon as you can cast again.

Time Lapse removes many unpleasant debuffs - including Dust of Appearance and abilities like Track, but remember that it won't necessarily help you with other forms of detection like a Gem of True Sight or Sentry Ward. However, you must be careful not to waste it on minor annoyances, as even at maximum level the cooldown is 40 seconds.

Also be aware that Time Lapse can make your health go down as well as up - for example if you got Mekansm'd and then used it. Also be aware that sometimes it's better to simply run away on low health rather than lapsing back into a bad position on full health.

On the subject of positioning - there are some additional tricks you can use it for - for example, shuki'ing away from pursing opponents and then lapsing back to your original position to evade them.

The choice of whether to use Shuki or Lapse when in a tight spot is vital - Lapse may restore your health and mana, but it doesn't reset your cooldowns, and you don't want to be left without Shuki in a tight spot. Quickly pick which one will help you the most in a given situation.

Skill Builds

Weaver has a relatively settled skill build - you ALWAYS take Shukuchi first, and generally max it first too. Time Lapse should be skilled at every opportunity too.

The main contention with his builds is when to level The Swarm instead of another level of Geminate Attack. Geminate is free, and useful right from the start, while the bugs are useful, but quite expensive early on.

Generally you'll only get a point in The Swarm when you're serious about pushing or having a larger scale fight - if you don't follow it up, it's just a waste of your limited mana and giving gold to the opposition. Armour reduction tends to come into it's own a little later in the game.

Role

Weaver has a lot of flexibility in his laning choices, but very little in his main role - he's always a carry of some kind, and needs farm to be effective. He's very capable of taking either mid and offlane provided he has the right opponent(s), or just farming the safe lane.

He's a good carry because he's quite flexible, and generally effective right from the start of the game into the late game. However, he aware that he has a very "hit and run" style, and isn't built for attritional "man fights", which can limit his effectiveness in team fights.

He can dominate multiple opponents, given the right lane, and is quite capable of picking up kills as well as farming creeps, and you should adjust his style as required. Generally you'll gank more when you have a harder carry on the team (to buy them space), and farm more when you don't.

Game Stages

Early

Depending on your laning choice and matchup you need to be either aggressive or relatively passive here. The first few levels especially are vulnerable time for you - while you have 4 seconds of maximum movement speed and invisibility straight away, you have quite a long wait until this is available again, and in the meantime are slow and squishy. Once you get more levels this vulnerability window is considerably shorter.

If you're in the offlane, or against an aggressive trilane, watch carefully for enemies with Sentry Wards - Shukuchi is massively less effective when they can still target you. You need to quickly figure out the opponent your laning against - between Shuki and Geminate, you have considerable harassment power, but you don't want to be coping too much yourself. You have considerable chasing power, so try to whittle down opponents and see if you can tempt them into a mistake that you can punish.

Mid


Depending on equipment, this is generally a good time for you - a big early item may make you very hard to deal with, or even a selection of smaller ones. Generally you want to be active, finding the sweet spot between pushing, ganking and farming. Enemies may have most of their abilities unlocked now, but won't necessarily have the extra equipment to really focus you down. Personally, I find that if things went well early on, I'll generally try to be active and aggressive in the midgame, further pushing our advantage forward. However, if things didn't go well, you can still recovery farm pretty well and comeback later in the game.

Generally you favour small engagements over larger ones, but should still turn up for team fights if at all possible.

Late

The late game can be good or bad for you, depending on the types of fights and equipment the opposition has. At this point it's not unusual to be coming up against Gem of True Sight or Necronomicon units which can badly limit your ability to be mobile in team fights - you'll likely also have to face items like Abyssal Blade, Scythe of Vyse and Daedalus - all of which can be present you with problems. However, you do have your own strengths now from your equipment - considerable extra damage and stats. Time Lapse is incredibly effective when you have a large HP pool (it's almost worth an Aegis), and you have great mobility for sneaky pushes and retreats.

Items

Starting:


Weaver has relatively straightforward starting equipment to choose from. Basically you want some consumables, and some starting components for your Ring of Aquila. You essentially have 3 choices here - lots of consumables (good for the offlane), or bonus stats/damage from Wraith Band or Ring of Basilius.

The Wraith Band works well when you need that extra damage for outhitting opponents, while the Ring of Basilius works especially well when you're part of a trilane, as it gives your allies extra armour and mana regen.


Core:


I've kept the core items pretty limited - mainly because this gives you more flexibility when deciding what to build into next.

The Ring of Aquila is an important part of your kit - it gives you mana regeneration (vital for keeping Shukuchi available) and some extra damage to help your last hitting and harassment. For the price it's really good.

Personally I prefer Power Treads over Phase Boots on Weaver - they give you more flexibility to increase your mana or health as required, as well as boosting your basic damage output (i.e. without Geminate Attack). Phase Boots do boost Geminate Attack damage, but the active is pretty useless for you, and they limit your late game damage.


Optional:


I wouldn't pickup these items in that many games, but they can be a useful adjustment to your build in many situations. Usually I'll get them when things aren't going very well, or I need to tailor my build for the midgame (e.g. you have a hard carry on the team who will need space creating for them).

The Drum of Endurance is basically a cheap way of bulking out your stats - a nice Bracer early on can make you considerably tankier, and it will also help with your damage and mana. The AS/MS boosts aren't terribly relevant, but still help a little - however the main point of this item is to quickly make you more resistant to burst damage. In comparison, you could pickup an Ultimate Orb for 2100 gold which is part of a Linken's Sphere - however, that's one large purchase, compared to lots of small ones.

Medallion of Courage is an interesting one - stacking armour onto Weaver isn't particularly necessary - this is far more about picking up kills using the active. It's a very aggressive choice, and in an ideal world a support would pickup one instead - however, it can quickly pay for itself if you bag some kills. Again, this is a good way of impacting the midgame and creating space for a harder carry.

Finally - the Magic Wand. I have mixed feelings about this item on Weaver - on the one hand, I'd prefer an item that gave you more stats, and wasn't another instant/reaction based defence - Weaver is already very reflex based, and this item does nothing to reduce that issue. However, due to your limited health/mana pools, a wand is capable of restoring a considerable amount of both at lower levels.


Defensive:


In the majority of games you're want to pick up a defensive item to protect you against spells relatively early on. They're not core because occasionally you may be able to go straight for a damage item if the opposition have made really poor picks against you, or your team is stomping hard.

The choice of defensive item is also very important to consider - they're not cheap, and their usage is quite different. As a carry, it's your responsiblity to deal damage, and I'd say you need a damage item right after your defensive one. You could potentially pickup the 2nd defensive item (if necessary) after this as a "luxury".

Many people regard Linken's Sphere as a core item on Weaver...but I don't agree. While it's a great item, there are occasions where a Black King Bar is more appropriate, and you need to weigh up the situation before spending your gold.

Linken's Sphere suits your "hit and run" style extremely well - often protecting you from a stun and giving you time to Shuki away. It also has the advantages of offering improved stats and regeneration. It can protect you against some of your strongest counters - like Doom, Ancient Seal and Fiend's Grip.

However, it can only protect you once every 17 seconds, and only against spells which were directly targeted upon you. Wily opponents will often use a less potent spell to remove it, before hitting you with the sucker punch.

Black King Bar doesn't offer the regen benefits of Linken's Sphere, or the passive protection. It's power runs down with repeat uses. However, it does let you stand up in a teamfight or gank situation and keep the majority of spells from hurting or stunning you. This can be pretty important for a hero who doesn't excel in these situations normally.

My normal consideration here is the balance of abilities that my opponents have - if they have a multiple stuns (especially AOE ones), silences and burst damage, BKB is usually the best choice. Linken's is extremely good when they don't have so many, or if you're against heroes who have magic immunity piercing abilities.


Damage:


These are my usual "go to" damage items on Weaver after completing a defensive item - hell, in some games I may even skip straight to them. Each offers a slightly different strength...

Monkey King Bar offers a really big boost to raw damage, and also prevents attacks missing through height or evasion. It can also mini-stun opponents, breaking channelling abilities like Town Portal Scroll. It's my standard choice if my opponents have any kind of evasion ability (like Blur or a Butterfly), and if I have missed a few kills through enemies being smart enough to TP away.
Desolator is a cheaper option, but still hits very hard thanks to it's armour reduction, which also makes it great for pushing, and for helping heroes on your team with strong physical damage. The only draw back is that it uses up your UAM/Orb slot, so closes off other options such as Satanic or Eye of Skadi.

Crystalys is an interesting item, offering more raw damage and the possibility of crits at a very low price. Generally I like to pickup crits a little later in the game (they stack with AS and damage), but this can be a good option if you need some extra punch and don't have much gold. Upgradable to Daedalus.

Diffusal Blade is another alternative - it's relatively cheap and gives you mana burn as well as agility and intelligence. I don't think purge is particularly useful on a hero as mobile as Weaver, but it can still be handy in some situations. Especially good when the opposition have mana reliant heroes like Wraith King or Medusa.


Luxury:


I'd frequently recommend you pick up the "other" item from the defence or damage item sets in addition to some of the choices here. However, I did want to include some suggestions for some additional items as you'll often have that kind of farm when playing Weaver.

Butterfly is a nice mixture of defensive and offensive power. It improves your armour and gives considerable evasion to physical attacks, while also boosting your damage and attack speed. Most useful in the late game where crits from enemy carries can get scary.

Heart of Tarrasque is the most potent item in the game for increasing the size of your health pool - which can be very useful on a hero like Weaver, and combines extremely well with Time Lapse. The rapid health regeneration away from combat can also be very handy, as you're quite good at slipping away and then back in again. However, it does nothing to boost your damage.

Satanic is a riskier alternative to the Heart - offering some improved damage and HP, plus considerable lifesteal. The main issue with this is that you need to be attacking in order to regen, and have enough damage to make the lifesteal worthwhile. However, it does let you stand up more in a straight fight - just be aware that it won't work with Desolator.

Eye of Skadi I've included here, although in some ways it's almost an alternative to the Damage and Defence route. It offers considerable stats as well as a powerful attack and movement slow. However, the issue I have with it is that it does nothing to protect you from damage/disables, and doesn't offer enough raw damage to make you effective. Still a good end game item if you get the gold together.

Boots of Travel as always, a useful late game option for global mobility and to save an item slot. The movement speed boost isn't particularly good for Weaver, so you're buying it purely for the utility.

Daedalus - the daddy of damage item, this works best when you already have considerable damage from other items, offering big crits and yet more raw damage. Not as reliable as the other options, but can inflict serious harm.

Manta Style - this is not a typical pickup on Weaver for several reasons - lack of stats means weak illusions, and he doesn't need the movement speed buff either with Shuki available. However, it can be useful for debuffing more effects, increasing your firepower and offers respectable stats. Situational.

Good Allies


The slow trickle of mana from Arcane Aura is great for a hero like Weaver who can have some early issues with Shuki use. Allows you to harass more and feel confident you won't run out.


A great ally for you, giving you a burst of damage block/regeneration when you need it from Living Armor. Can also be used aggressively for early tower dives to secure kills.


Useful synergy between your combined physical damage and armour reduction abilities. Shallow Grave can also be handy to give you time to get away a Time Lapse.


Armour reducers are generally very handy for you, boosting the impact of your physical attacks.


Another good ally - Aphotic Shield and Mist Coil can both help you enormously in tricky situations, with the shield being particularly effective for early dives.

Bad Enemies


Doom is brought up as a counter to nearly every hero, but in this case, it's a pretty specific one. While you can kite him quite effectively otherwise, Doom completely shuts you down - a long silence and damage is so, so bad for our poor bug. While Linken's Sphere can help, it's still relatively straight forward for him to use Lvl? Death to remove your protection.


An instant, long range silence combined with considerable burst damage is a bad combination for you. Easy meat for you otherwise or if you have a BKB.


Really unpleasant - he has two really long lockdowns (one that goes through BKB) as well as the ability to cripple your damage output, and a nasty nuke. Avoid.


Your ability to duck and weave make you effective against her later on, but early-midgame she can completely destroy you with the combination of Gust and Frost Arrows. You really don't want to lane against her if she has support.


The matchup here isn't ideal - Lion especially has considerable lockdown, while they both possess considerable burst damage. Later on, this isn't too much of a problem, but early game they can set you up for the kill. Although you need to give them considerable respect, remember that you can kill them pretty easily if they can't use their abilities.

Summary

So there you have it - a guide to Weaver. A carry with a high skill ceiling who can lane almost anywhere and offers solid impact throughout the game. As you can see, it's really important to consider enemy hero choices when deciding whether to pick him or not, and to try to get a good lane matchup. Weaver can dominate multiple enemy heroes if they have the wrong abilities to deal with him, or equally he can suffer badly in some 1v1 matchups that don't suit him.

In terms of carrying ability he's flexible in both style and timeframes. He can play in a snowball style, as part of a pushing team (he can even split push, to a point), or even as almost an AFK hard carry. His most effective timeframe depends completely on what equipment you put on him - multiple cheap items make him effective early, saving up for bigger more expensive items help him late.

Matching him up against other carries is difficult - his style means that he's generally most effective against melee heroes who he can kite and avoid fighting too directly. Unless you've got some substantial survivability equipment (e.g. Black King Bar and a Heart of Tarrasque or Satantic) then you don't want to be taking much damage - use Shuki to relocate and lose focus.

However, you're very effective at picking off supports, and space closing on other heroes who want to stay at the edge of the fight. You've got to find the right balance between using Shuki to manuever, and actually making your attacks; too much time invisible = not enough damage output.

A big part of these matchups depends on the heroes on the opposition team and their ability to wade in with stuns, silences and items like Scythe of Vyse or Orchid Malevolence.

Quick Comment (17) View Comments

You need to log in before commenting.

Similar Guides
Featured Heroes

Quick Comment (17) View Comments

You need to log in before commenting.

DOTAFire is the place to find the perfect build guide to take your game to the next level. Learn how to play a new hero, or fine tune your favorite DotA hero’s build and strategy.

Copyright © 2019 DOTAFire | All Rights Reserved