Lina Inverse, A Comprehensive Guide
Aethis
January 2, 2015
Introduction
NOTE!!!! This is not an alt-tab guide, and if you just randomed Lina and want a quick guide, this probably isn't for you.
Hello and welcome to the newly updated version of my guide to Lina Inverse the Slayer,this updated version is better in almost every way when compared to the original and includes a bunch of new info, including screenshots showing popular ward locations. This guide was last updated on the 3rd of September, 2014 and contains information that is applicable to DotA version 6.81.
 Lina is an intelligence hero who has large amounts of burst damage, good crowd control and scales better than most supports into the lategame due to her 3rd ability, Firey Soul she is also capable of being played as a semicarry and if given sufficient farm can become a force to be reckoned with later in the game, the downsides to Lina are that she is very squishy, relatively slow and that her stun is unreliable.
Stats:
STR 18 + 1.5/level
AGI 16 + 1.5/level
INT 27 + 3.2/level
HEALTH 492 + 28.5/level
MANA 351 + 41.6/level
DAMAGE 37 - 55
RANGE 670
ARMOR 1.24
MOVEMENT 295
Skills
 Lina's skills are as follows:
Q:  Dragon Slave, Lina channels the breath of a dragon, sending out a wave of fire that scorches every enemy in its path.
Range: 600
Damage: 110 / 180 / 250 / 320
Starting Radius: 275
Distance: 1075
Final Radius: 150
Mana Cost: 100 / 115 / 130 / 145 Cooldown Time: 8.5
This is a very spammable nuke that does good damage from a good range, combined with Lina's very high base intelligence and therefore mana pool, this spell is very powerful in lane, when combined with the attack speed from fiery soul this can allow you to easily out-harass most enemy heroes. You'll want to max this spell first in almost every circumstance as the reliable magic damage is too good to pass up on, even for DPS builds. Something to note when using dragon slave is that the effective range of the spell is longer than the casting range so you don't need to go as close to an enemy hero as the cast range implies to hit them with it, however the true effective range can only be effectively learnt with practice so have caution you don't overestimate the actual range of the spell.
W:  Light Strike Array, Summons a column of flames that damages and stuns enemies.
Range: 600
Radius: 225
Stun Duration: 1.6/1.9/2.2/2.5
Cast Delay: 0.5
Damage: 120 / 160 / 200 / 240
Mana Cost: 100 / 110 / 120 / 130 Cooldown Time: 7
This is once again a very spammable spell, that does good damage but with the added benefit of a stun, landing the stun can be tricky because of the delay and it us best to time your stun to hit as soon as an allies stun expires but if you have to land it on your own without a setup remember to account for the delay and try to predict the enemies movements. You'll want to max this second if you're supporting or last if you're carrying.
E:  Fiery Soul, Grants bonus attack and movement speed each time Lina casts a spell. Stacks with itself. Lasts 10 seconds.
Attack Speed Bonus: 40 / 55 / 70 / 85
Bonus Movement Speed: 5% / 6% / 7% / 8%
Max Stacks: 3
This spell is the reason DPS Lina builds exist it's a passive that at max level with max stacks gives Lina 255% increased attack speed, and 24% increased move speed, I like skilling this early, even on support builds, as in my opinion the increased attack speed will give you more damage in total throughout a prolonged engagement than the extra level in Light Strike Array. I recommend skilling Fiery Soul at level 4 and maxing it last when supporting, and skilling it at level 2 or 3 and maxing it second if you're playing as a core. It is important to note that by alternating the use of Dragon Slave and Light Strike Array properly it is possible to always have max Fiery Soul stacks, but this relies upon having a lot of mana regeneration.
R:  Laguna Blade, Fires off a bolt of lightning at a single enemy unit, dealing massive damage.
Range: 600 (900*)
Damage: 450 / 675 / 950
Mana Cost: 280 / 420 / 680 Cooldown Time: 70 / 60 / 50
This is one of the most damaging spells in the game, it will allow you to get kills early when used in combination with your other spells, the cooldown is almost criminally short at 70 seconds at level one and 50 seconds when maxed so essentially, if you're going to die, just ult someone, by the time you respawn and get back into the fight the cooldown will probably be finished. The most critical thing you must remember is to NOT USE YOUR ULT ON EMEMIES WITH 100HP!!!!!!! Using your 1000 damage nuke on an enemy with 100 hp is an absolute waste and only do it as a last resort if there is no other way to get the kill, lategame your ult can be used to:
A) Instakill squishy supports or
B) Take out a huge chunk of health from their carry
which option you choose is highly dependent on the game, for example if you can instakill an  Enigma, do it but maybe don't waste it on a
  Crystal Maiden. In general you want to use your ult at the start of a teamfight in order to take full advantage of the huge damage it offers.
Just make sure you're not scared drop your ult on a less than optimal target if you're going to die, it'll probably be off cooldown by the time you're back up and in the action anyway. It's also important to note that  Aghanim's Scepter changes the damage type to pure and allows
  Laguna Blade to pierce magic immunity which is a huge increase to the utility of the spell.
Items (support)
Always Have: 1x Town Portal Scroll, 1xObserver Wards
For the love of god, please carry a TP scroll, you can TP in to save allies or it could save your life. For 135 gold it's a no-brainer. (with wards you don't always need to be carrying them on you but try to make sure the map is warded)
Starting Items: 1x Tango, 1x
 Healing Salve, 3x
 Clarity, 3x
 Iron Branch, 1x
 Animal Courier
Or: 1x Tango, 1x
 Healing Salve, 3x
 Clarity, 2x
 Iron Branch, 1x
 Observer Ward
Either one of these builds are fine, but the courier takes precedence if nobody else buys one, it's your job and you'll have to get the wards later or ask someone else to get them, these are pretty basic starting items, stats and regen, what more is there to say?
Early Items:  Boots of Speed,
  Magic Wand,
  Arcane Boots,
  Urn of Shadows,
  Force Staff,
  Blink Dagger
Generally you want to buy these in order, they are cheap and cost effective items to help you reach your potential, boots of speed......for speed, would you have guessed it? Magic wand for the stats and the burst regen which can allow you to land that last stun or get away from a situation you otherwise wouldn't have, arance boots for the burst mana regen allowing you to spam your spells more often and also help your team, urn of shadows because every team needs one and since you'll be ganking you're a good choice for it since you need the HP and the mana regen is also nice, pick one of either Blink Dagger or Force Staff, Blink is better for initiating, but Force Staff can also help save your teammates. It's personal preference which one to buy, but Force Staff has an easier build up, so if you're behind it might be a better option.
MidGame Items:  Aghanim's Scepter,
  Scythe of Vyse,
  Eul's Scepter of Divinity
 Aghanim's Scepter is usually the 1st big item you'll want to build. It gives you around 400 health and 300 mana, which is nice but it also makes your ultimate pierce
  Black King Bar and changes the damage type to pure damage, meaning the damage isn't reduced by magic resistance. This is huge for you, it allows you to always be able to remove 950 health from an enemy carry, and makes you much more scary to heroes like Antimage who rely on their magic resistance to make up for their small hp pool.
  Scythe of Vyse is a great item as well, usually what you'll want to build after
  Aghanim's Scepter, it gives you a load of mana regen, a little to all stats, a lot of intelligence and most importantly a 3.5 second hex. The disable can turn a fight, and it's especially good against heroes such as
  Phantom Assassin who have evasion, since evasion is disabled during the hex, allowing your team to get some guaranteed hits off.
  Eul's Scepter of Divinity is a good item in a lot of situations, and it can help you set up your stun, it's a solid all around choice, I would only buy it before an
  Aghanim's Scepter if the enemy team don't have an early BKB carry.
Situational Items:  Mekansm,
  Pipe of Insight,
  Veil of Discord,
  Flying Courier,
  Gem of True Sight,
  Tranquil Boots,
  Ghost Scepter,
  Bloodstone,Dagon
These are in here for various reasons, if nobody else is going mek then you should get that after your urn, for pipe i recommend waiting until after your force staff and evaluation if it will be effective against the enemy team comp,  Veil of Discord is good if you have other heroes who rely heavily on magic damage: i.e.
  Queen of Pain however if you have an
  Aghanim's Scepter your ult's damage will not be increased by veil,
  Flying Courier is really a necessity, just buy one as soon as you can, Gem of True Sight is good to save on sentries for de-warding and generally good vs invis heroes, Tranquil boots are good if you can't afford arcanes and you really need the survivability,
  Ghost Scepter is good vs auto attack intensive carries.
  Bloodstone offers a good amount of health and mana, and a lot of mana regen, however it's not usually worth picking up over a
  Scythe of Vyse. Dagon is an interesting pickup on
  Lina, it offers almost no survivability but the burst damage is massive. Lategame a Dagon 5, and an
  Aghanim's Scepter ultimate deal over 1500 damage, and that is after taking the standard 25% magic damage reduction (it's 2050 before reductions). Dagon is only really recommended if the enemy have a squishy, easily killable carry, like
  Sniper AND you already have an
  Aghanim's Scepter AND you are doing well enough that you can get it while keeping up the support items like
  Observer Ward.
Items (DPS)
Always Have:  Town Portal Scroll
For the love of god, please carry a TP scroll, you can TP in to save allies or it could save your life. For 135 gold it's a no-brainer.
Starting Items: 1x Tango, 3x
 Iron Branch
If you're playing a core Lina you'll want to be heading mid almost every time, the idea here is to get a bottle up as quickly as possible while starting with some stats and regen.
Early Items:  Bottle,
  Arcane Boots,
  Urn of Shadows, Drums Of Endurance
Once you've got your bottle up you'll want to use Dragon Slave to harass the enemy mid as much as you reasonably can, follow up autoattacks with your increased attack speed from Fiery Soul and you should be able to easily secure control of the lane. Your boots of choice are still Arcanes, the mana is needed to be able to use your spells effectively and your early damage still comes from your spells. Urn is optional but recommended if nobody else is going for one, the strength and mana regen are both nice for you and the heal can heal you or an injured teammate. Drums are situational but they give you a nice boost to stats across the board, and the aura is always useful to have on the team.
MidGame Items:  Orchid Malevolence,
  Daedalus,
  Black King Bar
Orchid is a great first item on Lina, it gives you 50 damage and a lot of mana regen along with a large mana pool increase, the attack speed is mostly wasted but with the active silence you can kill almost any enemy hero solo. Daedalus is your go-to damage item, MKB can be substituted if they have a hero with evasion, such as  Brewmaster or
  Phantom Assassin, but generally Daedalus gives you more damage and the
  Crystalys is easier to build into and can make you more effective earlier than a raw
  Demon Edge. Alternatively if you're getting burst down a BKB is a great item, in fact it's almost required against teams with a lot of stuns or magic damage.
LateGame Items:  Boots of Travel,
  Scythe of Vyse,
  Eye of Skadi,
  Daedalus,
  Monkey King Bar,
  Satanic
Once you've finished up your Orchid and Daedalus/BKB you have some decisions to make, your options open up a lot here, the items listed above are my preference for being fully 6-slotted, however at this stage it's almost all situational, you might want to get a Shivas Guard for the armor and slow, or maybe an  Ethereal Blade and Dagon to allow you to burst down enemy heroes even easier. You'll usually want to build a
  Scythe of Vyse to replace your Orchid at some point, and an
  Eye of Skadi gives you a lot of health, armor, and a very useful orb effect. The lifesteal from
  Satanic stacks with the slow from Skadi so picking up a lategame satanic can help you further to tank up and give you a burst heal for when you get low.
  Boots of Travel are required whenever you no longer have slots for a TP scroll.
How to lane mid as DPS Lina
You want to get your bottle up as quickly as you can, feel free to last hit with Dragon Slave, especially if you can hit the enemy mid with it as well. Before the rune spawns every 2 minutes you should use Dragon Slave to kill the enemy creeps quickly to that you won't miss out on experience when you get the rune. Other than that you'll just want to get your arcanes up quickly, take a kill opportunity if it comes to you but don't push it too much, when you hit 6 you'll want to try and solo kill the enemy mid, and failing that gank the sidelanes.
Ganking as Lina
When you're ganking you want either 1) someone else to set up your stun for you, or 2) to stun the enemies from out of their vision. If they see you casting your stun then they can dodge it and you want to leave as little as possible to chance. Once you're stunned the enemy immediately followup with Dragon Slave and your ult to give you maximum Fiery Soul stacks and then proceed to autoattack the enemies down. Be very careful when ganking, if you get caught out of position you will probably die since your HP pool is so small. After a successful gank you'll want to head back to farming/supporting your carry depending on your role. Make sure you're communicating with your team, let them know you're coming and that they should stun first if they can, getting that little bit of talking happening can make the difference between a successful gank and a failure.
Conclusion
Lina is a very powerful hero who is capable of having a large impact at all stages of the game, while filling a variety of roles. Her stun, nuke and ult combo can get kills easily and Fiery Soul allows you to capitalize on your early kills and essentially makes attack speed items irrelevant. Your early game mana pool is massive and allows for spamming of your spells, however your HP pool is awful and positioning is paramount to successful Lina play. Lina's massive attack range, while often overlooked can make it much easier to harass enemy heroes and get last hits. Make sure to communicate with your team and try to combo with a hero with a reliable stun. Don't be afraid to mix up the skill and item builds based on the game you're in as they're both very situation dependent. The remaining sections are a basic warding guide for new players and the update log for the guide. If you're not interested in those sections then the actual content ends here.
Basic Warding Guide
This segment of the guide explains what warding is and where are some good locations for wards (screenshots are included), this is more aimed at players who are new to DotA or haven't warded much before so if you just want to info on Lina, skip this section. Unfortunately the full vision radius of most of these wards can't be seen from the screenshots because I couldn't zoom my DotA 2 out any further, and for those who are very new to the game, observer wards look like this ----> Observer Ward
The first ward location detailed here can be used by either radiant or dire, radiant defensively and dire offensively, it gives vision over a good portion of the radiant jungle in addition to showing the rune, the down-side to this ward is that if a gank is coming from mid, and they don't pass the rune, you might not see it until too late, however it still gives very good vision and it can show if the enemy are trying to loop around behind you for an early kill. (Picture Below)
The second location to be mentioned is another lower river ward, and in my opinion the best alternative to the ward listed above, it gives vision of the rune and almost all paths from mid to bot lane, short of them running all the way around and then they will be running right towards you down the lane, this ward does not however give as good vision into the radiant jungle, it's a toss-up for me between these two wards and you should make a call on which ward to go for on a game-by-game basis.. (Picture Below the ward itself is partially hidden by trees but it is slightly to the left of the centre of the picture)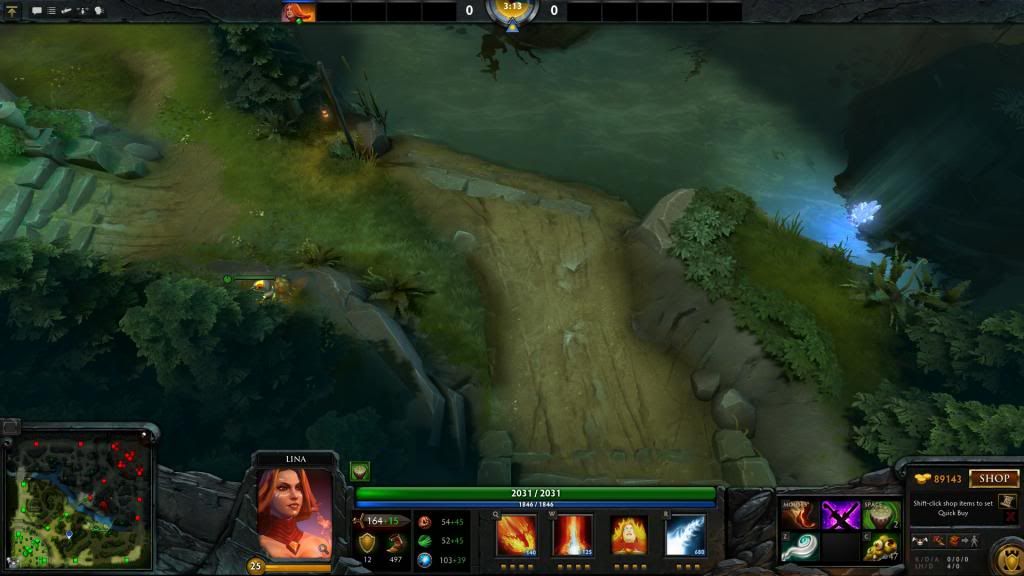
Another good ward location is on the top section of the river, on the cliffs overlooking the dire medium camp spawn, this is usually the best ward for warding the top rune as it gives good vision of the river and most ganking paths. (Picture Below)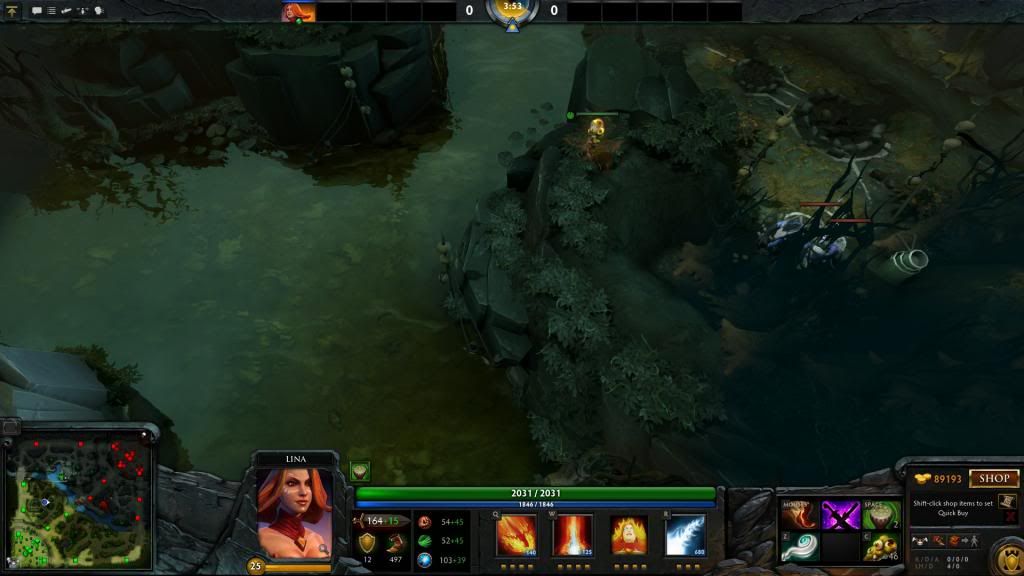
An alternative rune ward for the top rune is seen just on the edge of the radiants high ground by their ancient spawn, this gives better vision into mid lane allowing your mid to see the enemy mid even when they are on their high ground, while this ward is mostly inferior to the one mentioned above it can give your mid hero a significant edge so consider it if winning mid is very important to your strat or if your other lanes are solid. (Picture Below)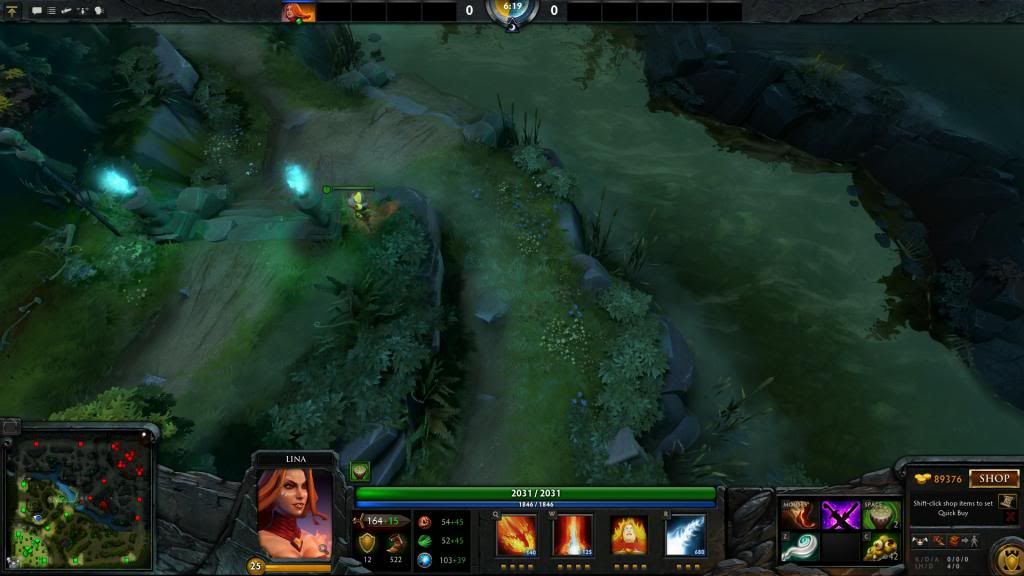
Other good wards are wards on the jungle high ground spots which give UNOBSTRUCTED vision in for the full radius of the observer ward, you may only want to use these wards later in the game though because the vision is pretty useless early. (Radiant and Dire Exaples Below)
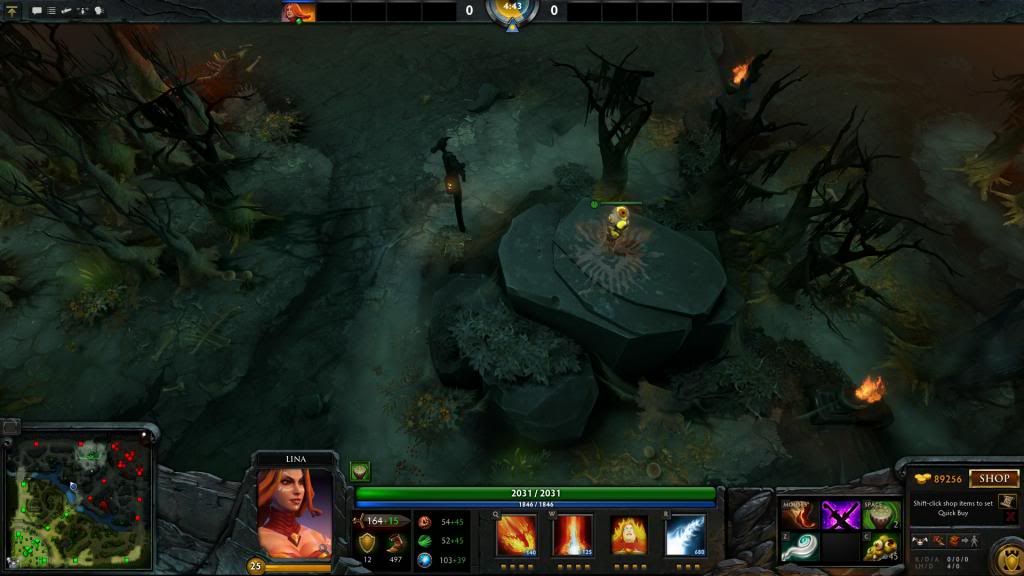
Another common ward a bit later in the game are wards in the enemy or friendly jungle to give vision of the area in order to either set-up ganks or to prevent ganks, depending on which jungle they are in, a dire example is shown below (NOTE 2 trees were cut down in this picture in order to achieve better vision, you can do this with a  Tango, ask a carry to use their
 Quelling Blade or use your
  Light Strike Array) and there are many other viable jungle ward locations that I haven't shown for time reasons.
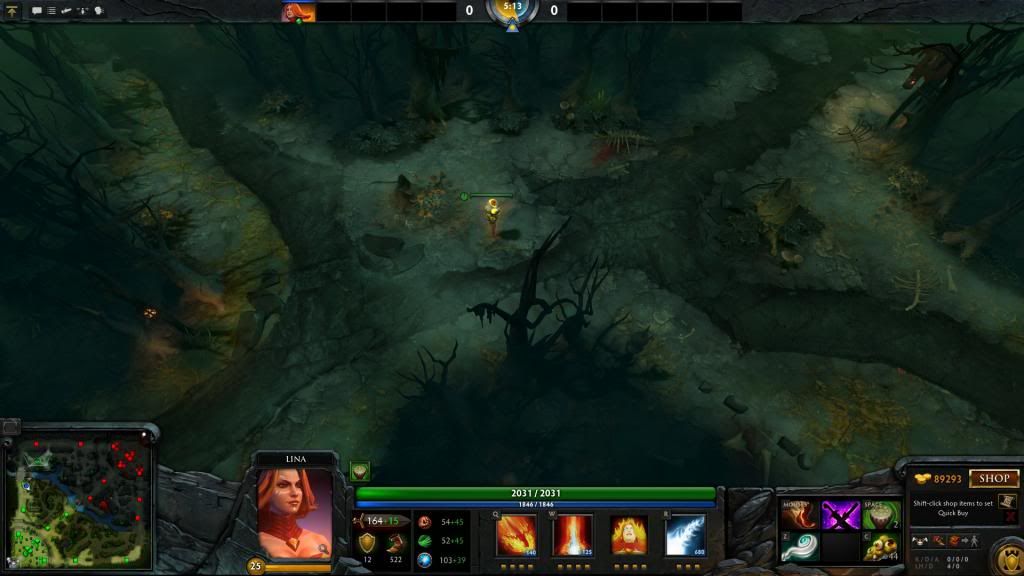
Another type or ward is placing wards in the enemy jungle camps in order to stop their neutral creeps from spawning, the box you need to place it in varies from camp to camp but generally if you plant it within a 200-300 radius of the centre of the camp it should block it. These wards are designed to stop pulling and to shut down enemy junglers. A special mention goes to the "Magic Bush Spot" here for managing to block 2 camps with one ward and give decent vision of the radiant jungle (it blocks the camp to the right of the ward and the camp up and to the left of it) Positioning is critical with this ward as a slight misposition can lead to it blocking only one camp or even neither camp. (Pictured Below is the magic bush spot ward)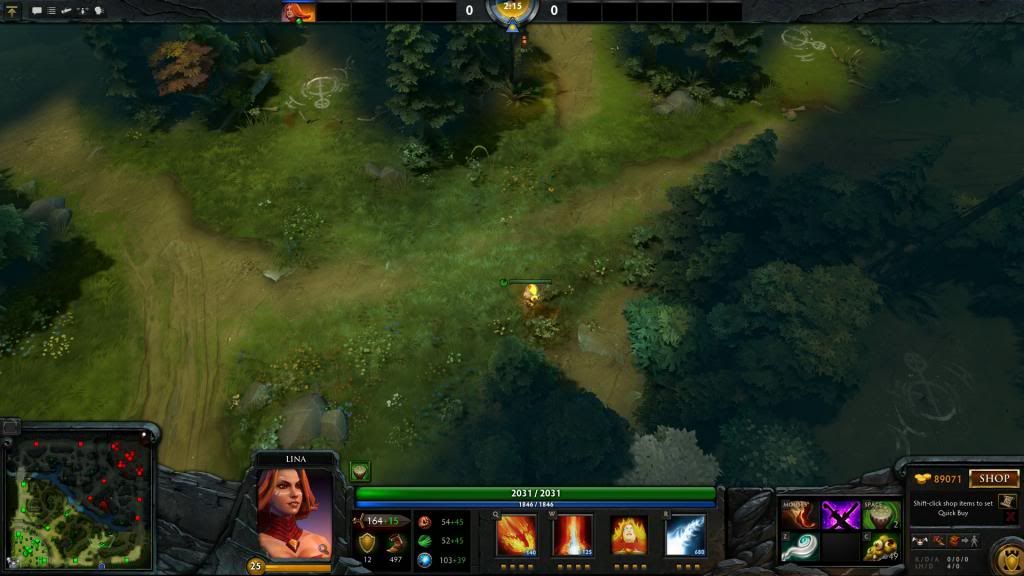
De-Warding/Counter Warding
De-Warding is placing a  Sentry Ward in order to reveal enemy observer wards and kill them, you want to do this when you know an enemy has a ward somewhere you don't want them to have a ward or when they have ward blocked one of the jungle camps you really want access to, the execution is very simple, place your sentry ward within 950 range of where their observer ward is, their ward is revealed and you kill it, however when de-warding blocked jungle camps be very careful to make sure your sentry doesn't block the camp because if it does then you're doing your enemies job for them. Other than that it's simple, this isn't required in most low-level pub games as the enemy aren't likely to be warding but if you do see them planting a ward with one of your wards, go and de-ward it if you have the gold.
Edits
2013/04/22:
Added the DPS Lina item explanation. Also cleaned up wording in several places and generally neatened things up. Also updated the ward cost to 150, essentially added an extra clarity to the ward starting build.
2013/05/15
Added Dagon as a Situational item after considering the burst.
2014/09/03
Brought the entire guide up to date with the current patch and fleshed out the DPS Lina section.
2014/11/08
Slight wording changes, changed the core items section to better reflect the current version (much more of an emphasis on Agh's, less on Bloodstone), removed ethereal blade from the situational items due to the change to Lina's Agh's upgrade.
2015/01/03
Changed numbers to reflect 6.83
Switched Eul's to core and Bloodstone to situational.
 Animal Courier


Quick Comment (4) View Comments
You need to log in before commenting.