Managing Your Lane Effectively
Sando
April 28, 2014
Introduction
This may seem a strange topic to write a guide about, but it's actually a very important part of determining which team gets the most farm and experience in the early game. This feeds into the mid game and can easily decide which way a match turns.
Ideally you should be able to keep the lane in the "optimimum zone" where the creep wave is fighting near to your tower, but not actually within range of it. This keeps you safe and gets you better farm/xp.
As such, this is a vital skillset for every player - carry, support, mid or offlaner. This guide will take you through all the tips and tricks which can help you to do it effectively...
What is managing your lane?
The primary idea of managing your lane is to keep the creep line in a position where you can maximise your own side's farm and experience, while minimising that of your opponents.
Lane position is also critical for when mid or roaming players from either team are looking to gank, and their chance of doing it successfully.
So where is the right place to have your lane? Ideally, you want it to be as close to your own tower as possible, but without actually being in tower range. Why? Because the tower will start attacking enemy creeps, making it harder to last hit, and rapidly pushing the lane back out again.
Common Mistakes
Here's a list of my most commonly seen bugbears in games:
Auto-attackers
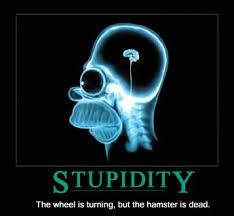
Uhhhh...derp. Very common with noobs, but some more experienced players sometimes do it too. Constantly attacking the enemy creeps with their hero - huzzah we're winning, look how much damage we're dishing out!
There is a time to attack enemy creeps - last hits, to control their momentum when they're about to push hard towards your tower, or when you want to push the enemy tower. Otherwise you should NEVER attack enemy creeps.
Non-blockers
It's pretty annoying when players don't bother or think it's important to block their creeps, especially on the first wave. With the recent changes that alter the initial speed of the safe and offlane creeps, it can be a bit tricky to block them effectively before they reach the middle tower, but you should always be blocking after that.
Remember that you can also block later in the game, if you can't pull for example, there's no reason not to drop back and block the next wave. Also try to let the ranged creep to the front of the pack for maximum effect.
Leave off Auras

 Vampiric Aura


There are very, very few auras that should be skilled early in the game (the possible exceptions being  Lunar Blessing and
  Precision Aura) - generally they're ineffective anyway, but they do tend to quietly push the creep wave forward. If you buy an item like
  Ring of Basilius, turn off the active effect unless you want to attack the tower.
Get off my Stack

Some greedy junglers like to beat up the easy camp, often without pulling the lane with it, or pulling the lane when it's massively inappropriate. I don't think these people realise the amount of damage they do to their team this way - up to 3 allied heroes may be losing out on farm and experience, their tower is damaged, and the enemy offlaner(s) will gain farm and experience from the lane being out of position.
How Lane Momentum Works
There are a number of factors that effect lane momentum, which we'll look at in more detail below. However, first of all lets have a look at the actual dynamics of how lanes behave.
Even if left completely untouched by players, there is a slight degree of randomness which can move creep lines slightly back and forwards. Why is this?
There's two things here - first and most importantly is concentration of force. As any good RTS player or strategist knows, concentration of force allows you to decisively win battles even when the two sides are equally matched.
How does this work?
Lets look at an example. Each wave sends out 3 melee creeps and 1 ranged creep. The melee creeps have 550 hp and 19-23 damage, ranged creeps have 300 hp and do 21-26 pierce damage (this inflicts 150% damage to other creeps). To make the maths a bit easier we're going to ignore things like armour and average out the damage so that melee creeps inflict 20 damage per hit, and ranged creeps 35.
Each wave inflicts a total of (20 x 3) + (35 x 1) per hit = 95. Each wave has a total of 1950 health, so it takes roughly 20.5 hits for waves to kill each other.
However, this ignores the fact that as individual creeps die, their damage is no longer contributed to the collective, so it actually takes longer than this. It also becomes increasingly important which creeps are attacking each other.
Example 1: each melee creep attacks it's opposite directly, with the ranged creep spreading it's fire between the enemy melee creeps.
Each enemy melee creep will take an average of (20 x 1) + (35 / 3) per hit = ~31.5, and die after approx 18 hits.
Example 2: all the creeps in a wave focus a single enemy melee creep, before moving on the ranged creep. That creep will take 95 damage per hit, and die after 6 (!) hits. The enemy creep wave now loses that 20 damage. The next enemy creep will also die after 6 hits, while the focusing creeps have not lost a single one yet. If we carry this example through, the focusing creeps will probably lose one melee creep, but take out the entire opposition wave with three still remaining.
Example 3: you block the creep wave and get the ranged one ahead of the others so he is attacked first. 4 enemies focusing the ranged creep will kill it in 300 / 95 = 4 attacks, removing over a third of your creep wave's damage early in the engagement. If the melee creeps now engagement equally, yours will need to do 28 attacks to kill their opponent.
Hopefully this shows you just how much concentration of force matters - and also how much damage ranged creeps inflict compared to melee ones.
So how can I use this ingame?
You can't directly control creeps, but you can influence their behaviour in various ways. The most important one is creep blocking (discussed in more detail below) - if you can get the ranged creep to the front of the wave by blocking the others, it will be attacked and quickly die due to it's weak hitpoints and lack of armour. This takes approximately 1/3 of the damage out of your creep wave early in the fight.
The other thing to do is to try to spread out your creeps so that they arrive in a vertical rather than horizontal formation - this means that the lead creep should be engaged by all the enemies, quickly focusing them down, and again reducing the damage output of your creeps.
Factors Affecting Lane Momentum
The examples above describe a fairly "clean" scenario, but actual play is rarely that straightforward once heroes get involved. Lets have a look at all the other factors that can affect lane momentum:
Actions that Push the Lane: (force)
+ Last hitting (Tiny)
Even "proper" single last hits push the lane a small amount - this is extra damage inflicted to the opposition creeps that your creep wave doesn't have to deal.
+ Attacking enemy creeps (Medium)
Obviously, attacking the enemy creeps will begin to push back their wave as you reduce their health.
+ Using Some Abilities (Varies, Medium)
Obviously if you cast abilities (even at enemy heroes) that deal area damage, they can hit enemy creeps to. Good examples are  Tidebringer and
  Flame Guard.
+ Passive and Item Auras (Varies, Small)
Auras like  Inner Beast or
  Ring of Basilius effect creeps too if skilled or activated.
+ Drawing Creep Aggro (Tiny)
If you target an enemy hero with an auto-attack while within a 500 range of enemy creeps, they will try to attack you. While this can occasionally be useful for breaking up focusing or drawing creeps in to last hit, it does mean that enemy creeps will be trying to attack you instead of your creeps for several seconds.
+ Going too close to your own Tower (Huge)
If you pull the lane too much, the enemy creep line will end up within range of your tower. The tower's powerful attacks will quickly decimate the enemy creeps and push the lane back out.
Actions that Pull the Lane: (force)
- Attacking or Denying your own Creeps (Medium/Small)
Allied creeps must be below 50% health in order for you to attack them, but from there you can use A-click. Denying reduces enemy experience to 36 per creep (down from 62 for melee creeps, 41 from ranged) - so denying melee creeps is especially important for XP, while killing ranged creeps has a greater effect on lane momentum.
- Creep Blocking (Medium)
This is using your hero to block the path creeps are taking to the frontlines (either through cutting across them or using the stop button), which reduces the speed that they advance. This is especially important with the first creep wave of the match, but can be used later on too.
- Creep Pulling (Huge)
This is most commonly performed by safe lane supports, who use the neutral camps near the lane to draw their creeps away to fight in the jungle. This weakens or kills your creeps and at least slows their move to the frontlines.
- Hero Abilities (Varies, Small)
A few hero abilities can also provide some lane control - such as Sacrifice, Demonic Conversion and
 Power Cogs
.
- Reaching the Enemy Tower (Huge)
If the creep wave does come within range of the enemy tower, it will push the lane back towards you in the same way as your own. You should be trying to avoid this however.
Judging Momentum
It's not always a case of Pulling Good, Pushing Bad. Lane control is about trying to keep the lane where you want it - usually close to your tower, but not actually within range of it.
Having the creeps within range of your tower not only pushes the lane back, but it's also usually damages the tower, and gives enemy heroes the chance to tower dive and attack you.
Lane control is something you can learn and actively try to get better at, but it's also a question of experience - the more different situations you see, and the more practice you get at doing it right. You'll figure out when you need to push the lane out a bit, and when to pull it in - using any of the methods listed above.
Here are some things to look for:
- How many creeps does each side currently have in the lane? Whichever side has more (and with more health) is likely to gain momentum against the other.
- What types of creep are they? Generally ranged creeps inflict significantly more damage than melee ones, while siege creeps inflict very minimal damage.
- Are heroes from either side attacking creeps? Each attack against enemy or allied creeps will alter the lane dynamic slightly.
- How far away from your tower is the creep wave at the moment? Try to draw it back when it gets further away, but stop when it's getting near your tower.
Creep Pulling
There are lots of video guides out there on Youtube that let you easily see how to pull using neutral creeps from the jungle, so I'm not going to spend time describing how to do this.
We are going to talk about WHEN to do this, and HOW to manage the neutral camps successfully.
The when is the easiest part - you should generally only pull the lane:
1) The lane has passed, or about to pass the half way point between the two lane towers.
2) You've stacked the easy camp, or know how to double-pull using the hard camp.
2a) Ideally you want to pull on the 00:11 rather than 00:41 timing, as this gives you the chance to restock the camp, but this isn't always possible.
2b) You don't really want to pull siege waves, as they tend to disrupt the camps for a while, and it causes more damage to your tower.
The how part is a bit trickier. The most important thing is to stack the easy camp as soon as possible, and keep stacking it further every chance you get. Obviously you have to be aware of enemy ward blocking and use of  Sentry Wards here.
Stacking up that easy camp means that they can usually beat your creep wave quite easily - making your pulls swift and effective. This wipes out your creeps completely (massive loss of farm and experience to the opposition), and will also move the lane back substantially.
You want that wave wiped out quickly so that the opposition has no opportunity to either contest or soak that experience, which is also another reason we need to wait until the lane has passed half way. Stacking camps also let you grab a last hit or two on the neutrals, but still keep the camp effective.
A quick note on Trilanes here: it's vital that safe trilanes use the neutral camps extensively to make up for the lost farm and experience spread over 3 heroes (that, or lots of kills in lane). One of the support heroes has to ensure they have  Sentry Wards from the start to avoid badly losing the lane if the enemy ward blocks your neutral camps.
Bringing it all Together
Lets have a look at a few scenarios that you might encounter in an average game, through the view of the various roles:
Start:
The first creep wave spawns and goes charging out from your barracks. Any heroes that aren't busy warding or contesting the first rune should be creep blocking their lane in a bid to slow it down as much as possible.
This first set of blocks is vitally important as it sets the baseline for their lane for the rest of that game. While the momentum will move back and forwards (especially with careful management), this is the starting point you'll be working from. Even that initial contact can be huge - keeping the lane on your side may be vital to those first last hits/denies, or the difference between avoiding or dying to a first blood attempt.
This is the job of ALL roles except junglers.
Control:
The different roles diverge a bit here, and the different heroes in a lane can also do quite a lot to effect this. For example an offlane melee hero may not be able to do as much denying/attacking their own creeps as a safe lane support.
Safe Lane Carries - their primary job is to last hit, and otherwise do as little damage to the enemy creeps as possible. Good carries will also help out with denying (they'll have better damage than their supports) and do some extra hitting on their own/enemy creeps as required.
Mid Players - generally busy and with a lot of things to consider, their primary jobs are to both last hit, and deny their opponent where possible. The towers are very close together in mid, and the high ground on each side gives a sizable advantage when used. Sometimes players will deliberately push the lane using abilities to give the opportunity to grab runes.
Offlaners - generally have the least chance to effect the lane dynamic, as they're usually heavily outnumbered and need to avoid feeding above all else. However, some heroes (especially ranged ones) can try their best to pull the lane backwards by attacking their own creeps and denying as much as possible. Against push lineups the opposite might be true! Remember that radiant offlaners can potentially pull using the dire hard camp.
Junglers - huh? Generally exempt from all this, they still need to be aware about attacking the safe lane pull and double pull camps, or at least working with their supports to do so.
Supports - generally have the most complicated job, and are most responsible for lane control. Good carries will be both denying and last hitting to keep lane equilibrium, but they have to prioritise the latter. Some carries like
 Kunkka
 will find it really difficult not to push the lane out, and you have to try to compensate with creep pulls and allied creep attacks. Make sure you stack the neutral camps heavily, and pull at that right times.
Think Ahead:
Use your experience to be ahead of the game - an ally using an AOE nuke isn't going to instantly push the lane forward unless creeps actually die from it. However, you know that any excessive damage will give your lane more forward momentum. Try to react in advance to what you think will be happening next.
If you see your lane currently has two allied range creeps and your melee creeps much more health than their opponents, you know that lane will be going forward soon. Maybe you can't attack your own creeps yet, but you could go and pull the lane to bring it back under control for the wave after.
The main thing is to be aware of what's happening in your lane, and what you can potentially do about it (if anything!).


Quick Comment (10) View Comments
You need to log in before commenting.